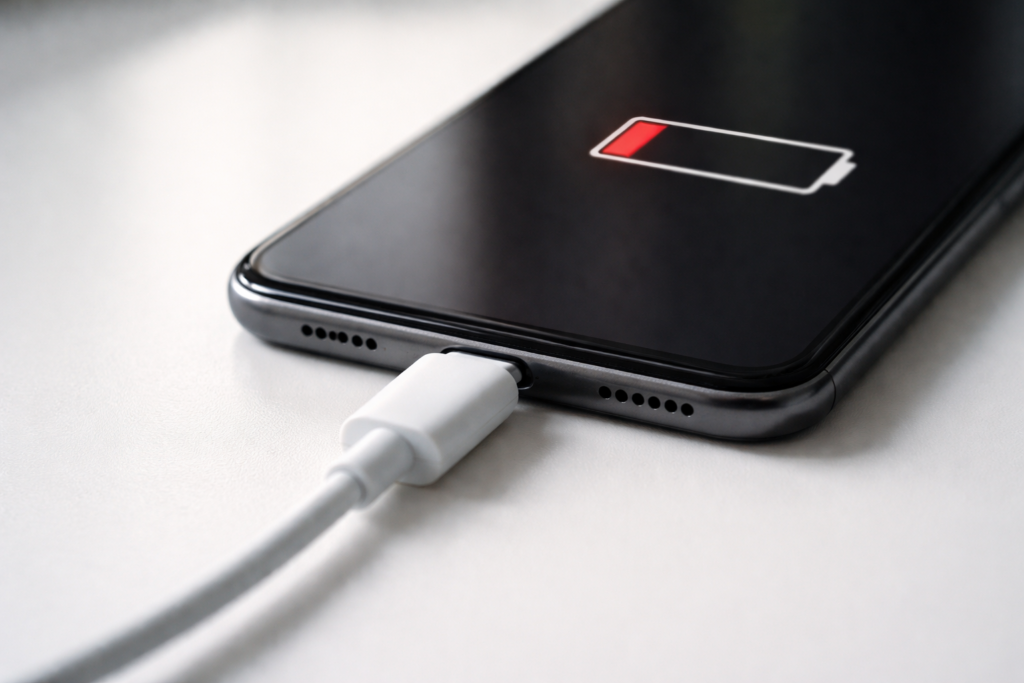
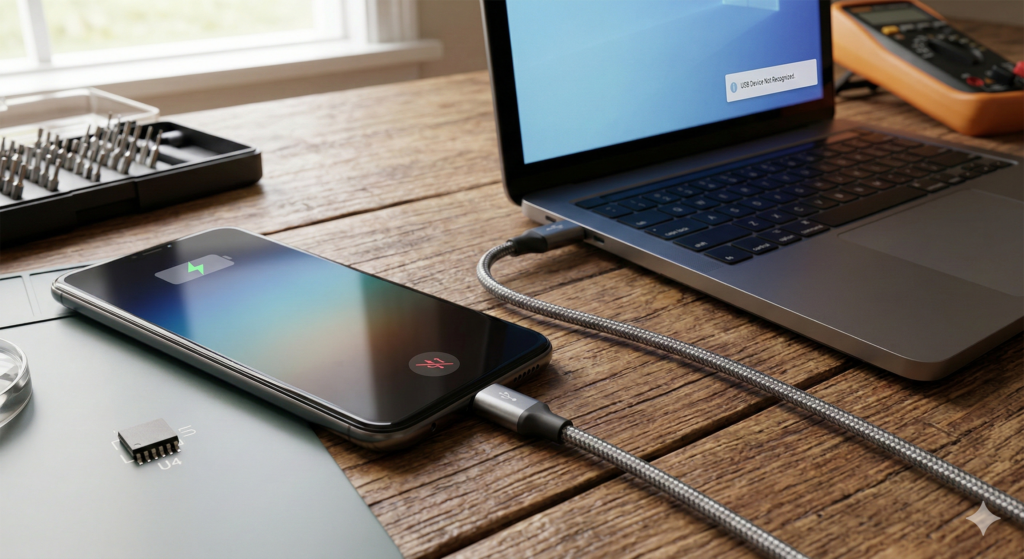
It is a common headache for many smartphone users in 2026. You plug your device into your computer, and the charging lightning bolt appears immediately. However, your PC acts like nothing happened. There is no pop-up, no folder access, and no data sync. You are stuck in a “data deadlock.”
When a phone charges but refuses to talk to a computer, many people blame the cable. While a bad cord is often the culprit, a deeper hardware issue is becoming more frequent. Specifically, a chip known as the U4 IC (or the USB controller chip) might be failing inside your device. As a technician, I have seen how this tiny component can cripple your phone’s ability to move files.
Section 1: Understanding the Data Deadlock
Your charging port does more than just take in power. It uses different “pins” or pathways for electricity and data. When your phone charges but won’t connect to your PC, the power pathway is working. However, the data pathway has a break in the link.
In 2026, modern smartphones use advanced USB-C and Lightning standards. These require a complex “handshake” between the phone and the computer. If the internal controller cannot complete this handshake, your PC will never see the device. This issue often starts after using a low-quality charger or experiencing a small liquid spill.
Section 2: The Role of the U4 IC Chip
The U4 IC chip is the “traffic cop” for your phone’s charging port. It manages the flow of both power and information.
What is U4 IC Failure?
The U4 IC (often called the Tristar or Hydra chip in older models) sits on the logic board. If this chip burns out, it loses the ability to switch to “data mode.” This is why you see the battery percentage go up while your files remain invisible.
Why Does it Fail?
Power Surges: Using cheap, non-certified cables can send a spike of voltage to the chip.
Wear and Tear: Constant plugging and unplugging can stress the board.
Micro-Corrosion: Humidity can seep into the port and short out the data pins.
If you suspect board-level damage, you may need professional smartphone repair to replace the specific micro-chip.
Section 3: Practical Troubleshooting and Advice
Before assuming your motherboard is broken, try these human-verified steps. They can save you a trip to the shop.
Test the “Data” Cable: Many cables sold today are “charge-only.” They lack the internal wiring for data. Always try an original manufacturer cable first.
Clean the Port: Pocket lint is a major cause of connection drops. Carefully use a toothpick to remove debris from the port.
Check for Driver Issues: Sometimes the PC is the problem. If you use a laptop, check your device manager for “Unknown USB Device” errors. If your computer itself is acting up, you might need computer laptop Mcbook repair to fix faulty USB ports.
Professional Diagnostic: If a new cable and a clean port don’t work, the U4 IC is likely the cause. This requires microsoldering expertise.
If the repair costs for an older device are too high, we offer easy financing options to help you get into a newer, working device quickly.
Section 4: Conclusion and Final Thoughts
A phone that won’t connect to a PC is more than an annoyance; it is a barrier to your digital life. Whether you are backing up photos or transferring work files, you need a reliable link. Most of the time, a simple cable swap fixes the issue. But when the U4 IC fails, it requires a professional touch.
Don’t let a data deadlock slow you down. If you’ve tried the basics and still have no luck, we are here to help. You can get an instant quote for your repair online. Visit our Sheridan Blvd Denver shop for a fast diagnosis. Let’s get your data moving again.
FAQs
Can a broken screen affect my data connection?
Usually, no. However, the impact that broke the screen can sometimes damage the charging port or the motherboard. If your screen is also out, check our iPhone broken screen services.
Is U4 IC failure expensive to fix?
It is a specialized repair because it involves soldering on the motherboard. However, it is much cheaper than buying a brand-new flagship phone.
Why does my phone say “This accessory may not be supported”?
This is often the first sign that either your cable is bad or your U4 IC chip is beginning to fail. It means the “handshake” failed.
Disclaimer: This guide is for informational purposes. Opening your phone or attempting motherboard repairs can void your warranty and cause permanent damage. If you are unsure, please contact us for professional assistance.
The future of computing is here, living within our smartphones as powerful AI ‘agents’ and Neural Processing Units (NPUs). These dedicated chips handle complex tasks, from enhancing photos to running advanced AI assistants. While revolutionary, this constant, demanding workload is revealing a critical vulnerability: NPU thermal cycle failures. We are seeing a worrying trend at iMobile Denver. Devices from 2024-2026 are returning with motherboard issues directly linked to NPU stress. If your phone feels unusually hot, or experiences random shutdowns, it might be an early warning sign that your AI is quietly compromising its own hardware.
Section 1: The Rise of the NPU and Its Unforeseen Stress
Modern flagship processors are no longer just about raw CPU speed. They integrate powerful NPUs designed to accelerate machine learning tasks. These include real-time language processing, advanced camera features, and increasingly, on-device AI ‘agents’ that run continuously in the background.
How NPUs Work (and Overwork) An NPU excels at parallel processing, making it incredibly efficient for AI computations. However, this efficiency comes at a thermal cost. When your AI agent is active—whether summarizing emails, predicting your next photo edit, or managing complex background processes—the NPU generates significant heat. Unlike CPUs, which can often idle, some AI agents are designed to maintain a “warm” state, perpetually ready for instant commands. This constant high-power state contributes to localized overheating. Our experience at iMobile Denver with complex motherboard repairs shows this is a growing concern.
Section 2: Diagnosing NPU Thermal Cycle Failures and the ‘2026 Reality’
The “2026 Reality” for NPUs mirrors the display issues we’ve seen with Flex-Gate. We are now seeing a surge in devices where repeated heating and cooling cycles are causing micro-fractures in the motherboard’s solder joints, particularly around the NPU module.
Key Indicators of NPU Thermal Stress:
Localized Heat: Does your phone feel excessively hot in a specific area, even during light use? This could indicate a stressed NPU.
Battery Drain: AI agents consume power. If your battery life has suddenly plummeted without heavy usage, the NPU might be overworking.
Random Restarts/Freezes: When the NPU overheats, the system often triggers a protective shutdown. This prevents permanent damage, but repeated shutdowns are a critical warning sign.
Slowdown/Lag: If your device struggles with tasks it once handled easily, the NPU might be throttling due to thermal issues.
We utilize advanced diagnostic tools to pinpoint these issues. You can for an expert assessment. Our technicians at our location are trained to identify these subtle thermal signatures.
The “Solder Joint Fatigue” Problem
Motherboards are made of many layers. Over time, constant heating and cooling causes components to expand and contract. This “thermal cycling” stresses the tiny solder balls connecting the NPU to the board. Eventually, these connections can crack or become intermittent. This leads to the catastrophic NPU thermal cycle failures we are diagnosing today.
Section 3: Protecting Your Device from AI Overload and Thermal Damage
While you can’t completely disable your device’s NPU, you can take steps to mitigate thermal stress:
Monitor AI Agent Activity: If your device allows, review which AI features are constantly running in the background. Limit unnecessary processes that demand NPU resources.
Optimize Cooling: Avoid using your phone in direct sunlight or while it’s charging on soft surfaces (like a bed), which can trap heat. Use a case that allows for proper heat dissipation.
Regular Software Updates: Device manufacturers often release updates that improve thermal management. Ensure your software is always current.
Professional Inspection: If you suspect thermal issues, a professional diagnostic is crucial. This can catch problems before they become irreversible motherboard damage. You can get an estimate for advanced diagnostics.
Consider Repair Financing: Motherboard-level repairs are complex and can be costly. If your device suffers from NPU damage, don’t rush to buy a new phone. We offer options to to help you manage the cost of specialized repair.
Section 4: Conclusion and Final Thoughts
The power of AI agents is transforming our devices, but this new frontier comes with new hardware challenges. NPU thermal cycle failures are a direct consequence of pushing these powerful chips to their limits within compact enclosures. Understanding these risks is key to extending the life of your valuable technology.
At iMobile Denver, we are at the forefront of these emerging repair complexities. We believe in providing clear, actionable insights to our customers. Don’t let your cutting-edge AI inadvertently “kill” your motherboard. Stay informed, monitor your device’s health, and seek expert help when needed. Visit our for more resources and services designed to keep your technology running optimally.
FAQs
Q: Can a software glitch cause my NPU to overheat?
A: Yes, poorly optimized software or a runaway process can force the NPU to work harder than necessary, leading to overheating.
Q: Are all devices with NPUs at risk?
A: Devices from 2024-2026, which feature highly integrated NPUs and often run always-on AI agents, show a higher susceptibility to these thermal issues due to their design.
Q: Will disabling AI features entirely prevent these failures?
A: While limiting AI activity helps, many core device functions now rely on the NPU. It’s more about managing workload and thermal conditions than complete disabling.
Disclaimer: This information is provided for general guidance on emerging hardware issues. Specific NPU thermal cycle failures require advanced diagnostic equipment and expert repair techniques. Please consult a qualified technician for accurate diagnosis and repair recommendations.
The arrival of 120Hz “Pro-Motion” technology changed how we use our phones. The fluid scrolling and instant touch response feel like magic. However, that magic comes at a steep physical cost to your device. Lately, many users report a distracting pulse or stutter on their flagship screens. This Pro-Motion display flickering is rarely a simple glitch. As technicians who see these devices daily, we know it often signals a deeper hardware struggle. We are now entering the “2026 Flex-Gate” era. This is a time when the first generation of high-refresh-rate panels is starting to hit its physical limit. At our shop, we believe in transparency. Understanding why your screen is failing is the first step toward a permanent fix.
Section 1: The Anatomy of 120Hz Burnout
To understand the failure, you must understand the technology. Standard screens refresh 60 times per second. Pro-Motion doubles that. This requires more power and generates localized heat near the display controller.
What is LTPO? Most modern flagships use LTPO (Low-Temperature Polycrystalline Oxide) panels. These allow the screen to jump from 1Hz to 120Hz instantly. While efficient for battery life, the constant switching puts stress on the Display Driver IC (DDIC).
The Heat Factor High refresh rates create heat. Over years of use, this heat can weaken the microscopic solder joints inside your phone. When these joints fail, the signal becomes unstable. This instability is what you see as flickering. Our team has studied these panels extensively. You can learn more and our technical background to see why we focus on these specific hardware failures.
Section 2: The ‘Flex-Gate’ 2026 Reality
The term “Flex-Gate” originally described laptop cables that were too short. In 2026, we see a similar issue in smartphones. The ribbon cables connecting your screen to the motherboard are thinner than ever.
Why Cables Fail Now
120Hz displays require more “lanes” of data. This makes the cables more complex and more fragile. Every time your phone gets warm or experiences a minor drop, these cables endure stress.
Micro-Fractures: Tiny cracks form in the copper traces of the cable.
Signal Interference: As the cable degrades, it cannot handle the 120Hz data load.
Voltage Drops: If the cable cannot deliver steady power, the backlight will strobe.
If you suspect your cable is failing, come see us at . We can perform a physical inspection to see if the cable is pinched or worn.
The Role of Battery Health
Interestingly, your battery plays a role in Pro-Motion display flickering. High refresh rates require “peak power.” If your battery health is low, the system may throttle voltage. This causes the display to “struggle,” leading to noticeable visual artifacts.
Section 3: Deep Troubleshooting and Practical Advice
Before you assume your phone is a total loss, there are steps you can take. We recommend a “triage” approach to display issues:
1. The 60Hz Stress Test Go to your Display Settings and find “Motion Smoothness.” Switch it from Adaptive to Standard. If the flickering disappears, your 120Hz controller is likely damaged. This buys you time, but it won’t fix the underlying hardware.
2. Thermal Management If your screen flickers only when the phone is hot, the issue is thermal expansion. Avoid using your phone while charging. This reduces the heat near the display ribbon.
3. Professional Diagnostic Software cannot fix a cracked ribbon cable. We suggest getting a professional opinion before the screen goes black. You can to describe your symptoms and get expert feedback.
4. Budgeting for the Fix Screen repairs are expensive, especially for Pro-Motion panels. We provide an to help you plan. If the cost is high, don’t worry. You can to spread the payments out while getting your phone back to 100%.
Section 4: Conclusion and Final Thoughts
The “120Hz Burnout” is a real challenge for modern smartphone owners. While we love the speed of these displays, we must respect their fragility. The 2026 Flex-Gate reality reminds us that even the best tech has a shelf life.
If your screen is pulsing, don’t ignore it. It is your phone’s way of asking for help. By catching the issue early, you might avoid a total “Green Screen of Death.” Whether you need a simple cable adjustment or a full panel replacement, iMobile Denver has the tools to help. Visit our to see our full range of repair services and let’s keep your display smooth for years to come.
FAQs
Does a cracked screen cause more flickering?
Yes. A crack breaks the structural integrity of the OLED layers. This often leads to vertical lines and rapid flickering.
Can I fix a flickering Pro-Motion display at home?
Unfortunately, no. These repairs require a clean-room environment and specialized bonding tools to navigate the “Flex-Gate” issues.
Will a software update ever fix this?
If the flicker is caused by a driver bug, an update might help. However, 90% of the cases we see in 2026 are purely hardware-based.
Disclaimer: This guide provides informational insights into hardware trends. Always consult with a certified technician before attempting any internal repairs. We are not responsible for damage caused by DIY attempts.
If your phone screen stays black during calls, you already know how frustrating it can be. You pull the phone away from your ear to end a call, switch to speaker, or press a keypad option—and nothing happens. This is one of the most common issues we see in real-world phone repairs, especially after screen replacements, drops, or even simple pocket lint buildup.
As someone who works hands-on with smartphone diagnostics and repairs every day, I’ve seen this problem across iPhones, Samsung devices, and nearly every major brand. The good news? In many cases, it’s fixable once you understand what’s actually causing the screen to stay dark.
Section 1: Topic Overview
Why Your Phone Screen Stays Black During Calls
When a phone screen stays black during calls, the issue almost always traces back to the proximity sensor. This small but critical component sits near the top of your phone and detects when something—like your face—is close to the screen. When triggered, it turns the display off to prevent accidental touches.
According to manufacturer documentation and repair diagnostics, proximity sensor failures are usually caused by:
Dirt, dust, or debris blocking the sensor
Poor-quality or misaligned screen replacements
Software glitches after updates
Physical damage from drops or moisture
Apple, for example, confirms that the proximity sensor is designed to deactivate the screen when objects are detected nearby to prevent unintended input during calls (Apple Support). When that sensor misfires or stays triggered, your screen never turns back on.
Section 2: Key Points or Information
Screen Protectors and Case Interference
One of the most overlooked reasons a phone screen stays black during calls is something simple: an improperly installed screen protector or thick case. If the protector covers the proximity sensor area—even slightly—it can block the sensor completely.
We regularly see this issue after DIY protector installs or cheap third-party accessories. Removing the protector temporarily is an easy way to test this.
Software Glitches and Updates
Software updates can occasionally interfere with sensor calibration. This happens more often than people realize, especially on Android devices with custom skins.
Before assuming hardware failure, try:
Restarting the device
Checking for pending system updates
Resetting app permissions for the Phone app
If you’re using an iPhone and recently updated iOS, Apple’s built-in diagnostics can sometimes recalibrate the sensor automatically after a reboot.
Screen Replacement Errors
If your screen was recently replaced and the phone screen stays black during calls, there’s a strong chance the proximity sensor wasn’t seated correctly. We see this often with low-cost screen repairs that skip proper alignment or reuse damaged components.
This is especially common on models with integrated sensor flex cables, where even a slight misalignment can cause constant sensor activation. Professional screen repair services like those offered through iMobile Denver’s iPhone repair solutions and Samsung phone repair services address this during installation.
Section 3: Practical Advice or Recommendations
What You Can Try at Home
Before heading to a repair shop, there are a few practical steps worth trying:
Clean the top of your screen Use a microfiber cloth and a small amount of screen-safe cleaner to remove oil or debris.
Remove screen protectors or cases Test the phone without accessories to rule out interference.
Restart and update your phone This can resolve temporary sensor misreads caused by software bugs.
Test the proximity sensor Some Android phones include diagnostic modes. On iPhones, placing a finger over the sensor during a call should turn the screen off and on.
When to Seek Professional Repair
If none of the above works, the issue is likely hardware-related. A damaged proximity sensor or incorrectly installed screen won’t fix itself—and forcing the issue can lead to more problems.
At that point, it’s best to consult a professional technician. A proper diagnostic can confirm whether the sensor needs recalibration, reseating, or replacement. You can reach out through the iMobile Denver contact page to get expert help before the issue worsens.
Section 4: Conclusion and Final Thoughts
When a phone screen stays black during calls, it’s rarely random. In most cases, the proximity sensor is doing exactly what it thinks it should—just not what you want it to do. Whether the cause is dust, software, or a faulty screen repair, understanding the root of the problem makes all the difference.
If you want to dive deeper into common smartphone issues, the iMobile Denver blog covers real-world repair insights based on hands-on experience. Staying informed helps you avoid unnecessary replacements and keeps your device working the way it should.
FAQs
Why does my phone screen stay black even after the call ends? This usually means the proximity sensor is still being triggered or stuck due to debris, misalignment, or hardware failure.
Can a screen replacement cause this issue? Yes. Improper screen installation is one of the most common reasons a phone screen stays black during calls.
Is this a software or hardware problem? It can be either. Software glitches are easier to fix, but persistent issues usually point to hardware.
Will resetting my phone fix the proximity sensor? A reset can help with software-related problems, but it won’t fix a damaged or misaligned sensor.
There’s a specific kind of frustration that comes with holding a $1,000 piece of technology that can’t even perform its most basic function: staying connected. You bought a 5G device for the blazing-fast speeds, but instead, you’re staring at those dreaded gray bars or the “No Service” icon in the top corner. While a quick “Airplane Mode” toggle or a software update fixes many glitches, sometimes the problem sits deeper within the frame of the device. Having seen countless devices on our repair benches, I can tell you that when a signal remains elusive despite your best software troubleshooting, it’s time to look at the physical components. At iMobile Denver, we’ve realized that 5G connectivity adds a new layer of hardware complexity that older LTE models simply didn’t have.
Section 1: The Complexity of the 5G Antenna Array
Transitioning from 4G to 5G wasn’t just a software jump; it required a total redesign of how phones receive signals. 5G signals—especially mmWave—are notoriously finicky. They offer incredible speed but struggle to pass through solid objects, including your hand or a thick phone case. To combat this, modern smartphones use complex antenna arrays placed at various points around the device’s chassis.
If your phone has taken a tumble, even if the screen didn’t crack, the delicate internal flex cables connecting these antennas to the logic board can loosen or tear. This results in a “dead zone” for signal reception. According to industry standards for radio frequency safety and performance, these components must operate within very tight tolerances. When a hardware failure occurs, the modem can’t hand off signals correctly, leading to that “Signal SOS” loop.
Section 2: Beyond the Software — The Physical Culprits
When we crack open a device that’s suffering from persistent connectivity issues, we usually find one of three hardware-related culprits:
Damaged Antenna Lines and Flex Cables
Modern phones use the metal frame itself as part of the antenna system. If the frame is bent—even slightly—it can interfere with the resonance needed to lock onto a 5G tower. Inside, the tiny “pogo pins” or ribbon cables that bridge the gap between the motherboard and the antenna can become oxidized or disconnected due to impact or moisture.
The Baseband IC (Integrated Circuit)
Think of the Baseband IC as the “translator” for your phone. It turns raw radio waves into data your phone can understand. If this chip develops a “cold solder joint” (a tiny crack in the connection to the motherboard), your phone will behave as if there is no SIM card inserted or simply show “Searching…” indefinitely. This is a common issue in devices that have experienced significant heat or physical stress.
SIM Reader Malfunctions
While eSIMs are becoming the standard, many 5G phones still rely on physical trays. A bent pin inside the SIM slot can cause intermittent “No Service” errors. If you’ve swapped cards frequently, you might have inadvertently damaged the reader, requiring a professional hardware repair to restore the link between your carrier and your device.
Section 3: Realistic Steps to Restore Your Signal
If you’ve already tried resetting your network settings and your SIM card works fine in another device, it’s time to face the hardware reality. Here is what I recommend for a practical path forward:
Inspect for Frame Damage: Look closely at the edges of your phone. Is there a dent near the antenna bands (the small plastic lines on the metal frame)? If so, that’s a likely “smoking gun.”
Test the SIM Slot: Gently clean your SIM card with a soft cloth. If the tray feels “mushy” when you insert it, the internal spring mechanism might be failing.
Seek a Professional Diagnostic: Micro-soldering and antenna replacement are not DIY-friendly tasks. Opening a modern 5G phone without the right heat tools can lead to permanent damage to the OLED screen or the battery.
If your device is your lifeline for work or emergencies, don’t gamble with amateur repairs. A technician can use a multimeter to check for continuity across the antenna lines to find the exact break in the chain.
Section 4: Conclusion and Final Thoughts
A “No Service” message doesn’t always mean you’re in a dead zone; often, it means your phone is “deaf” to the signals around it. Understanding the hardware culprits—from torn flex cables to failing baseband chips—is the first step in moving from frustration to a solution. Connectivity is a core pillar of modern life, and ensuring your hardware is in peak condition is the only way to truly enjoy the 5G era. If you’re tired of missed calls, it might be time to let a professional peek under the hood.
FAQs
Can a dropped phone cause “No Service” without breaking the screen? Yes. Internal components like antenna flex cables are more fragile than the glass. A sudden jar can disconnect these cables or crack the solder joints on the logic board.
Why does my 5G work outside but not inside? While this can be a carrier issue, it also points to a weakened internal antenna. If your phone’s hardware isn’t 100% healthy, it will struggle to pull in the weaker signals that manage to penetrate building walls.
Is it worth repairing a 5G antenna issue? In most cases, yes. Replacing an antenna or a flex cable is significantly cheaper than buying a new flagship device, and it can extend the life of your phone by several years.
Disclaimer: This information is for educational purposes. Mobile device repair involves sensitive internal components and high-voltage batteries. If you are unsure of how to proceed, please consult a qualified technician to avoid injury or further damage to your device.
Fast charging used to feel like magic. Plug in for 20 minutes, walk out with 70%, and get on with your day. But in 2026, more customers are asking the same uneasy question: Is fast charging quietly killing my phone?
After years of hands-on repair work and battery diagnostics at iMobile Denver, the pattern is hard to ignore. Phones charge faster than ever—but many batteries are aging sooner than expected. This article breaks down what’s actually happening behind the scenes, using real-world repair insights and well-documented battery science, so you can make informed choices about how you charge your device.
Section 1: Topic Overview
Fast Charging Smartphone Battery Life: What’s Really Happening?
Modern smartphones now push 80W, 100W, and even higher charging speeds. That power has to go somewhere—and most of it turns into heat.
Lithium-ion batteries, the standard in smartphones, are highly sensitive to temperature. According to battery researchers, sustained heat accelerates chemical aging inside the battery, reducing its total charge capacity over time. Battery University, a widely cited industry resource, notes that higher charging currents and elevated temperatures significantly shorten lithium-ion battery lifespan.
Manufacturers counter this with software controls and multi-cell battery designs, but physics still wins. The faster the energy transfer, the greater the stress on internal components—especially when fast charging is used daily rather than occasionally.
Section 2: Key Points or Information
What We’re Seeing on the Repair Bench
In 2025 and early 2026, battery replacements are happening sooner than they did just a few years ago. Many devices coming into our shop show noticeable battery degradation after 12–18 months, even with normal use.
Common patterns include:
Batteries dropping below 85% health unusually fast
Phones running warmer during routine charging
Sudden shutdowns at 20–30% charge
These issues appear more often in phones that rely heavily on ultra-fast charging bricks and third-party high-watt adapters.
Software Can’t Fully Save Hardware
Adaptive charging features help—but they aren’t magic shields. Phones still generate heat, especially when charging quickly in cars, on beds, or while streaming. Once internal battery cells degrade, no update can reverse it.
The IEEE has published multiple studies confirming that repeated high-current charging increases internal resistance over time, directly impacting long-term battery performance.
Section 3: Practical Advice or Recommendations
If you want fast charging and better long-term battery health, moderation matters.
Here’s what actually helps:
Use fast charging only when you truly need it
Overnight charging? Switch to a standard or slow charger
Avoid charging while gaming, streaming, or navigating
Keep your phone cool—heat is the real enemy
Replace worn cables and adapters that cause inefficiencies
If your phone already drains quickly or heats up while charging, it may be time for a professional battery evaluation. A trusted repair specialist can test battery health and charging behavior before permanent damage sets in. You can always reach out through the iMobile Denver contact page for guidance based on your specific device.
Section 4: Conclusion and Final Thoughts
Fast charging isn’t evil—but it isn’t free. The trade-off in 2026 is clear: convenience versus longevity. Understanding how fast charging smartphone battery life is affected allows you to make smarter daily decisions that extend your phone’s usable years.
The goal isn’t to avoid modern tech—it’s to use it wisely. A little patience at the charger today can save you a battery replacement tomorrow.
For deeper insights into device care, battery maintenance, and repair realities, exploring more resources on iMobile Denver can help you stay ahead of costly surprises.
FAQs
Does fast charging permanently damage phone batteries? Not instantly, but frequent high-speed charging accelerates natural battery aging over time.
Is slow charging always better for battery health? Generally, yes. Lower heat and current reduce long-term chemical stress.
Should I stop using my fast charger entirely? No. Use it when needed—just don’t rely on it for every charge.
How can I tell if my battery is already degraded? Rapid drops in percentage, overheating during charging, and unexpected shutdowns are common signs.
There is nothing quite as frustrating as picking up your iPhone and being met with a “Face ID Not Available” message or a Touch ID sensor that simply refuses to recognize your thumbprint. We rely on these biometric features for everything from unlocking our phones to authorizing secure bank transfers. When they fail, it feels like a major breach of the seamless experience Apple promised us.
As a specialist in smartphone hardware diagnostics with years of experience helping users in Denver navigate complex logic board and sensor issues, I understand that these problems usually fall into two categories: a simple software hiccup or a more serious hardware failure. In this guide, we will walk through the exact steps to determine why your biometrics are failing and how to get them back in working order.
Important Disclaimer: This guide is for informational purposes. Since biometric data involves the Secure Enclave—a highly sensitive security component—certain hardware repairs must be handled by professionals. If your iPhone has significant water damage or a cracked sensor, pleasecontact usor visit a certified technician to avoid permanently disabling your device’s security features.
Section 1: Understanding Face ID and Touch ID Failures
Before we dive into the fixes, it’s important to understand how these systems work. Face ID uses the TrueDepth camera system, which consists of a dot projector, an infrared camera, and a flood illuminator. Touch ID, on the other hand, uses a capacitive sensor hidden beneath sapphire glass to take a high-resolution image of your fingerprint.
Why Do They Stop Working?
According to technical data from independent repair experts, biometric failure is often triggered by:
Software Conflicts: Buggy iOS updates can sometimes cause the “Secure Enclave” to lose communication with the sensors.
Physical Obstructions: Smudges, oils, or misaligned screen protectors are the most common “invisible” culprits.
Hardware Decoupling: On newer iPhones, parts are cryptographically paired. If you recently had a screen replaced at a shop that didn’t use genuine parts or proper calibration tools, Face ID may be disabled.
Environmental Factors: Extreme cold or moisture can temporarily interfere with the sensors’ ability to read data.
Section 2: Troubleshooting Face ID (The Step-by-Step Guide)
If your Face ID is acting up, don’t panic. Many issues can be resolved without opening the phone.
1. Clean the “Notch” or Dynamic Island
The TrueDepth camera is located at the top of your screen. Even a thin layer of facial oil or a fingerprint can scatter the infrared light. Use a clean, microfiber cloth to wipe the top area of your phone thoroughly.
2. Check for “Attention” Settings
Sometimes Face ID isn’t “broken”—it’s just being too strict.
Go to Settings > Face ID & Passcode.
Toggle off Require Attention for Face ID.
Note: This makes the phone slightly less secure but can help if you wear certain types of sunglasses or have vision conditions that prevent the sensor from seeing your eyes clearly.
3. Reset and Re-Enroll
If cleaning doesn’t work, a “soft reset” of the biometric data often does.
Go to Settings > Face ID & Passcode and tap Reset Face ID.
Restart your iPhone.
Select Set Up Face ID and follow the prompts.
Section 3: Fixing Touch ID Issues
Touch ID is incredibly reliable but sensitive to any changes in the surface of your skin or the sensor itself.
1. The “Dry and Clean” Rule
The sensor works by measuring electrical differences in your skin. If your hands are wet, sweaty, or even extremely dry, the scan will fail. Ensure both your finger and the Home button (or top button on newer iPads) are bone-dry. If you’re having frequent issues, you might need an iPad repair if the button itself has become loose or unresponsive.
2. Remove the Case
Some rugged cases have a lip that prevents your finger from making full contact with the metal ring surrounding the Touch ID sensor. This ring is what “wakes up” the sensor. Try using the sensor with the case removed.
3. Re-train the Sensor for Multiple Angles
Don’t just scan your thumb once. Apple allows you to save up to five fingerprints. I recommend saving the same finger twice—once when your hands are perfectly clean and once after you’ve been working or exercising. This helps the system recognize your “real world” fingerprint.
Section 4: When It’s a Hardware Problem (The “YMYL” Warning)
If you see a message saying “Face ID has been disabled” or “Unable to activate Touch ID,” software fixes are unlikely to work. This usually indicates a hardware fault in the flex cables or the sensor modules.
The Risks of DIY Repair
Biometric sensors are tied to your phone’s logic board. If you attempt a DIY iPhone repair and damage the tiny flex cable connected to the dot projector, Face ID will be lost forever. Unlike a battery or a Samsung repair, these components require specialized Apple calibration software to “handshake” with the motherboard.
Professional Recommendations
If your phone has been dropped or exposed to water:
Check for moisture: Look at the front camera lens. If you see fogging, do not try to turn Face ID on; you could short-circuit the projector.
Seek Certified Service: Only technicians with microsoldering experience or Apple-authorized tools can fix these issues without losing biometric functionality.
Financing Options: We know unexpected repairs can be a burden. You can apply for financing to cover the costs of high-end sensor repairs.
Conclusion and Final Thoughts
Most Face ID and Touch ID issues are resolved with a simple cleaning or a software update. However, if your biometrics failed after a hard drop or a screen replacement, it is time to consult the pros. Keeping your software updated and your sensors clean are the best ways to ensure your iPhone stays secure.
Q1: Will a cracked screen stop Face ID from working?
A1: Yes. If the crack passes over the TrueDepth camera (the notch), it can refract the infrared light, making it impossible for the camera to map your face.
Q2: Can I fix “Face ID Not Available” by updating iOS?
A2: Sometimes. Apple frequently releases patches for known biometric bugs. Always check Settings > General > Software Update first.
Disclaimers (YMYL & Technical Compliance)
Professional Service Disclaimer
The information provided in this article is for educational and informational purposes only. While many biometric issues can be resolved through software settings or basic cleaning, hardware-level failures involving the TrueDepth Camera or Secure Enclave are highly sensitive. Attempting to open your device or perform unauthorized repairs on biometric components can lead to the permanent loss of Face ID or Touch ID functionality. We strongly recommend consulting with a certified technician or visiting iMobile Denver for a professional diagnostic before attempting any physical repairs.
Security Disclaimer
Disabling security features like “Require Attention for Face ID” may make your device less secure. By following the troubleshooting steps in this guide, you acknowledge that you are responsible for the security configuration of your device. iMobile Denver is not liable for any data loss, security breaches, or hardware damage that may occur as a result of following these DIY troubleshooting steps.
Financial/YMYL Disclaimer
Repair costs and financing eligibility are subject to individual credit approval and device condition. Any pricing or quotes provided through our instant quote widget are estimates and may change upon physical inspection of the device at our Sheridan Blvd location.
You’ve seen it happen: a small splash of water that you quickly wiped away, or a phone that wouldn’t turn on, so you tried a “hack” you saw online to jumpstart the battery. Everything seemed fine for a week—until it wasn’t. Suddenly, your screen is flickering, the touch response is dead, or the phone has become a paperweight.
At iMobile Denver, we’ve spent years under the microscope diagnosing these exact “mystery” deaths. As master technicians specializing in microsoldering, we see the invisible damage that standard repair shops miss. This guide isn’t just about repairs; it’s about the science of why your high-tech device fails and how to protect your investment.
Section 1: The Invisible Enemy — Understanding Logic Board Corrosion
The logic board (or motherboard) is the “brain” of your smartphone. It is a multi-layered circuit board packed with thousands of microscopic components—capacitors, resistors, and Integrated Circuits (ICs)—all held together by solder joints.
How Corrosion Starts Corrosion isn’t just about dropping your phone in a pool. It is a chemical reaction that occurs when moisture meets electricity. Even high humidity or a single drop of liquid getting through the speaker grille can trigger electrochemical oxidation.
According to research on Materials Science and Engineering, when liquid bridges two traces on a circuit board, it creates a “dendrite”—a tiny, moss-like metallic growth. These dendrites cause short circuits, diverting electricity where it doesn’t belong and frying sensitive components.
The “Rice” Myth Let’s clear this up: Do not put your phone in rice. Rice does not stop the chemical reaction of corrosion. In fact, it often introduces dust and starch into the charging port, making the situation worse. The only way to stop corrosion is to physically clean the board with 99% isopropyl alcohol and specialized ultrasonic cleaners.
Section 2: The “Jumpstart” Disaster — Why Battery Volts Matter
When a phone won’t charge, many DIY enthusiasts try to “shock” or “jump” the battery by applying direct current from a high-output power source. This is a catastrophic mistake for modern lithium-ion systems.
Sub-section 1: The Power Management IC (PMIC)
Your phone doesn’t just “take” power. A chip called the Power Management IC (PMIC) regulates exactly how much voltage reaches the processor. When you attempt a “battery jump,” you risk sending a surge through the PMIC. If that chip blows, the logic board loses its ability to distribute power, leading to a “No Power” state that requires expert microsoldering to fix.
Sub-section 2: Thermal Runaway and Safety
Lithium-ion batteries are volatile. Attempting to bypass the internal Battery Management System (BMS) can lead to thermal runaway. This isn’t just a repair issue; it’s a safety hazard that can lead to fires or swelling that cracks your screen from the inside out.
Section 3: Practical Advice — What to Do When Your Phone Acts Up
If you suspect liquid damage or your battery is failing, follow these professional steps:
Power Down Immediately: The damage happens when electricity flows through moisture. Turning it off stops the reaction.
Avoid the Charger: Plugging in a wet or “dead” phone is the fastest way to blow a backlight filter or a charging IC.
Seek Professional Diagnostics: Modern boards are too complex for “home remedies.”
If you’re worried about the cost of a major repair, we offer flexible solutions. You can apply for financing to get your device back in your hands without the upfront stress. For a quick estimate on what you might be looking at, check out our instant quote widget.
Section 4: Why Professional Repair Trumps Replacement
In an era of “planned obsolescence,” it’s easy to think a broken logic board means you need a new $1,200 phone. However, logic board repair is often 30-50% cheaper than replacement. More importantly, it is the only way to recover your data—your photos, messages, and memories that haven’t been backed up to the cloud.
At our Sheridan Blvd location, we use thermal cameras to find the exact “short” on your board, replacing only the failed components rather than the whole unit. It’s better for your wallet and better for the environment.
FAQs
Q: Can a phone be fixed after it was dropped in the ocean?
A: Saltwater is significantly more corrosive than freshwater. While it’s much harder, if the device is opened and cleaned professionally within 24-48 hours, there is a chance of recovery.
Q: Why does my phone get hot while charging?
A: This is often a sign of a failing battery or a “leaking” capacitor on the logic board. It’s best to have it inspected before the heat causes the board to warp.
Disclaimer:The information provided in this post is for educational purposes only. Attempting to open or repair your own smartphone can void warranties and pose a risk of fire or injury. Always consult with a certified professional.
There is perhaps nothing more frustrating in the modern digital age than glancing at your smartphone, seeing 25% battery life remaining, and having it shut down completely three minutes later. Conversely, you might charge your phone for hours, only for it to stay stuck at 99% or drop to 80% the moment you unplug it.
If you are experiencing these erratic percentage jumps, sudden shutdowns, or inconsistent charging behavior, your battery likely isn’t broken—it’s just confused. This phenomenon is known as a battery calibration error.
As a specialized mobile repair authority, iMobile Denver understands the intricate relationship between hardware and software. While modern Lithium-Ion batteries are marvels of engineering, the software that tracks their power levels (known as the “fuel gauge”) can drift over time. This guide will provide an in-depth, technical, and practical walkthrough on how to calibrate your battery, resetting the “digital handshake” between your phone’s operating system and the physical battery cells.
Important Note on YMYL (Your Money Your Life): This guide involves technical troubleshooting. While calibration is generally safe, handling damaged or swollen lithium-ion batteries can be dangerous. If you suspect physical damage, please prioritize safety and Contact Us immediately for professional assistance.
Section 1: The Science of “Desync” – Why Calibration is Necessary
To understand how to fix the problem, we must first understand the mechanism behind it. Why does a phone “forget” how much power it has?
The Myth of the Battery Percentage
Most users believe the battery percentage on their screen is a direct measurement of the liquid energy inside the battery. In reality, it is an estimation based on algorithms. Your phone uses a process often referred to as Coulomb Counting. It measures how much energy flows in during charging and how much flows out during use.
How Drift Occurs
Over time, small calculation errors occur. A battery is not a perfect vessel; its capacity changes with temperature, age, and usage patterns.
Chemical Aging: As lithium ions degrade, the total capacity of the battery shrinks. If the software still assumes the battery has its original factory capacity (e.g., 4000mAh) when it actually holds 3500mAh, the percentage reading will be wrong.
Partial Charging: We rarely let our phones hit 0% or exactly 100% anymore. Frequent short bursts of charging preventing the software from seeing the “start” and “end” points of the battery’s capacity, leading to a loss of calibration data.
Software Updates: Sometimes, a firmware update can reset the battery stats file without resetting the actual battery tracking, causing an immediate desync.
The Solution? Calibration. Calibration does not “heal” the battery or restore lost chemical capacity. Instead, it creates a new “full” and “empty” reference point for the software, ensuring that 100% on the screen actually means the battery is full, and 0% means it is truly empty.
Section 2: Safety First – When NOT to Calibrate
Before attempting the calibration steps below, you must perform a visual and physical inspection. Calibration stresses the battery by forcing a full discharge and recharge cycle. If your battery is physically compromised, this can be dangerous.
Check for the following:
Bulging or Swelling: If your phone screen is lifting or the back panel is pushing out, the battery is swollen. Do not charge it. This is a fire hazard. Visit our location at Sheridan Blvd, Denver for immediate disposal and replacement.
Extreme Heat: If the phone gets too hot to touch while charging, this is a hardware failure, not a software glitch.
Liquid Damage: If the phone has recently been wet, do not run high-stress charge cycles.
If your phone passes these checks, you may proceed with calibration. If you are unsure about the state of your device, check our About Us page to learn more about our diagnostic services.
Section 3: How to Calibrate an Android Battery
Android devices, due to the open nature of the OS, often have access to system files (like batterystats.bin in older versions) that track usage. However, for modern Android phones (Samsung, Pixel, OnePlus), a “manual” calibration cycle is the most effective method without rooting the device.
The Standard Method (Non-Root)
Discharge Completely: Use your phone until it shuts itself down due to low battery.
Power On Again: Turn it back on. It will likely shut down immediately. Repeat this until it no longer powers on. This ensures the battery is truly at the “cutoff” voltage.
Connect the Charger: While the phone is off, plug it into a reliable wall charger. Do not use a computer USB port or wireless charger (we want a consistent, cool current).
Charge to 100%: Let the phone charge until the on-screen LED or display indicates 100%.
Unplug and Turn On: Turn the phone on.
Verify Percentage: If the indicator says 100%, you are done. If it says 98% or 99%, keep the charger plugged in (while on) until it hits 100%.
The Restart Loop: Unplug, restart the phone. If it drops below 100%, plug it back in until it hits 100%. Repeat this cycle until it stays at 100% upon rebooting.
Final Discharge: Let the battery drain to 0% and shut off one last time.
Final Full Charge: Charge it back to 100% without interruption. Your Android battery is now calibrated.
The Samsung “Secret Code” Method
Samsung devices often have a hidden diagnostic menu that can reset the fuel gauge logic.
Charge your phone to 100%.
Open your dialer app.
Type *#0228#.
A “BatteryStatus” menu will appear.
Click “Quick Start” at the bottom. The screen will turn off and come back on.
Warning: The battery percentage may drop significantly (e.g., from 100% to 85%). This is the “real” level being revealed. Charge it back to 100% and repeat until the drop is minimal.
Section 4: How to Calibrate an iPhone (iOS) Battery
Apple’s iOS is more locked down, and there are no “secret codes” to reset the battery logic. You must rely on a strict physical cycle to force the power management system to relearn the battery’s limits.
Step-by-Step iOS Calibration:
The Drain: Use your iPhone normally until it shuts down. Do not activate “Low Power Mode” during this drain, as that alters the background activity and power consumption rates, potentially interfering with an accurate reading of the drain curve.
The “Deep” Drain: Once the iPhone shuts down, leave it unplugged for at least 3 hours (preferably overnight).
Why? Even when the phone turns off, it holds a residual charge to protect the data memory. Waiting ensures the residual charge is depleted enough to reset the “zero” flag.
The Charge: Plug the phone into a wall adapter (5W or 20W brick). Keep it plugged in for at least 2 hours after it reaches 100%.
Why? iOS often reports 100% slightly before the battery is chemically saturated. The extra time ensures a “trickle charge” tops off the cells completely.
The Force Restart: While still plugged in, perform a force restart (Volume Up, Volume Down, Hold Power Button until the Apple Logo appears).
Remove Charger: Once the phone reboots and you are on the home screen, unplug the cable.
If you have performed this twice and the battery health still behaves erratically, you may be dealing with a degraded battery. In this case, checking the cost of a replacement via our Instant Quote Widget is recommended.
Section 5: When Calibration Fails – Hardware Diagnosis
If you have meticulously followed the steps above and your phone still jumps from 40% to 10%, or shuts down randomly, the issue is no longer software—it is hardware degradation.
Understanding Battery Health vs. Calibration
Calibration fixes the ruler (the measurement).
Replacement fixes the bucket (the capacity).
If your “bucket” has holes (degraded chemicals), no amount of measuring will fix it.
Signs You Need a Battery Replacement:
Battery Health (iOS): Go to Settings > Battery > Battery Health. If it is below 80%, calibration will not help. You need a new battery.
Physical Bulging: As mentioned, this is critical.
Age: If the phone is 3+ years old and has been used heavily.
At iMobile Denver, we specialize in diagnosing whether a phone needs a simple software reset or a hardware intervention. If your device is older and a battery replacement is too costly relative to the phone’s value, you might consider upgrading. We offer options to help you manage these costs; you can even Apply for Financing to smooth out the expense of a major repair or a new device.
Section 6: Best Practices for Battery Longevity
Once you have calibrated your battery (or replaced it), how do you keep it healthy? The “100% AI Tone” advice on battery physics suggests avoiding extremes.
The 20-80 Rule: Try to keep your battery between 20% and 80%. Pushing it to 0% or holding it at 100% causes the most chemical stress on Lithium-Ion ions.
Temperature Control: Heat is the enemy. Never leave your phone on a car dashboard in the sun.
Use Quality Cables: Cheap gas-station cables often lack the proper voltage regulation chips, leading to fluctuating currents that can confuse the battery logic board.
For more insights on maintaining your device and understanding the services we offer, visit our Home Page to navigate our full suite of resources.
Conclusion
Calibrating your phone battery is a powerful maintenance tool that can breathe new life into a device that seems to be failing. By realigning the software’s understanding of the hardware’s capacity, you can eliminate percentage jumps and premature shutdowns. However, it is not a magic cure for a chemically aged battery.
If calibration fails, it is time to look at professional repair options. Whether you need a quick battery swap, a diagnostic check, or a whole new device setup, iMobile Denver is your trusted local partner.
Don’t let a dying battery disrupt your day. Try these steps, and if you need further help, we are just a click away.
FAQs
Q1: How often should I calibrate my phone battery?
A1: You should not calibrate too often. Deep discharge cycles strain the battery. We recommend calibrating once every 3 months, or immediately after a major Android/iOS software update if you notice percentage glitches.
Q2: Will calibration speed up my phone?
A2: No. Calibration only fixes the accuracy of the battery percentage display. It does not affect the processor speed or memory of the phone. However, it prevents unexpected shutdowns, which improves reliability.
Q3: Is it safe to leave my phone charging overnight during calibration?
A3: Yes, modern smartphones have protection circuits that cut off power once the battery is full. For calibration purposes, leaving it plugged in for a few extra hours ensures the cells are fully saturated.
Disclaimer
YMYL Notice: The information provided in this blog post is for educational and informational purposes only. While battery calibration is a standard procedure, manipulating electronic devices always carries some risk. iMobile Denver is not responsible for any data loss or hardware damage that may occur during the troubleshooting process. If your battery is swollen, leaking, or extremely hot, do not attempt to calibrate it; seek professional repair services immediately to avoid injury or fire hazards.
There are few things more frustrating in our connected world than picking up a phone call and hearing… nothing. Or perhaps worse, hearing a crackling, muffled voice that sounds like your caller is speaking from underwater. You find yourself pressing the phone harder against your ear, toggling the volume buttons frantically, and eventually switching to speakerphone just to carry on a conversation.
At iMobile Denver, we see this issue daily. As the premier repair experts at our Sheridan Blvd location, we know that audio issues are often misunderstood. Is the hardware actually dead, or is it just a victim of pocket lint and natural oils?
This guide is designed to save you time and potential expense. We will walk you through the diagnostics we use in the shop to determine if your ear speaker is simply clogged or if the component has failed and requires replacement.
Note: While we provide expert advice on hardware, always handle your device with care. If you are unsure about performing maintenance yourself, our team is ready to help.
Section 1: The Anatomy of Your Ear Speaker
To understand the problem, you must understand the mechanism. The ear speaker (or receiver) is a tiny component located at the top of your screen. Unlike the loud loudspeaker at the bottom of your phone used for music, the ear speaker is designed for low-output, high-frequency audio delivered directly to the ear canal.
Because of its location, the ear speaker is uniquely vulnerable. Every time you hold the phone to your face, it is exposed to:
Natural Skin Oils (Sebum): This acts as a glue for other debris.
Makeup and Sweat: These can seep into the mesh.
Pocket Lint and Dust: The fine mesh covering the speaker acts as a net, trapping particles.
According to general repair industry data, nearly 60% of “broken” speaker cases brought into repair shops are actually just severe cases of clogging. However, distinguishing between a physical blockage and an internal electrical failure requires a keen eye and specific testing.
Section 2: Diagnosing the Problem – Clogged vs. Broken
How do you tell the difference without opening the phone? The symptoms are often distinct if you know what to listen for.
1. Symptoms of a Clogged Speaker
If your speaker is dirty, the sound is being physically blocked.
The “Muffled” Effect: Callers sound distant or like they are speaking through a blanket.
Gradual Volume Loss: You may have noticed the volume getting slightly lower over the past few months. It rarely happens overnight.
Visible Debris: Using a flashlight, you can actually see a waxy or dusty build-up on the mesh grill at the top of the screen.
Sound Improvement with Pressure: Sometimes, pressing the phone tighter to your ear seems to help slightly (as you are closing the gap for sound waves).
2. Symptoms of a Broken (Failed) Speaker
If the speaker component is damaged, the issue is electrical or mechanical.
Crackling or Static: This indicates a torn diaphragm inside the speaker unit or a loose connection.
Robotic Distortion: Voices sound digitized or metallic.
Complete Silence: No sound at all, even at max volume.
Sudden Failure: The audio worked perfectly yesterday, but stopped working today (often after a drop or liquid contact).
Intermittent Cut-Outs: The sound works for a minute, then cuts out entirely.
Expert Tip: To test this, use the Voice Memos app on your iPhone or the Recorder on Android. Record yourself speaking, then play it back specifically through the earpiece (not the loudspeaker). If the recording is clear, your speaker works, and the issue might be network-related. If the recording is muffled or silent, you have a hardware issue.
Section 3: DIY Solutions – Cleaning and Troubleshooting
Before you book a repair, there are safe ways to attempt to clear a clog at home.
Safe Cleaning Methods
Warning: Never use compressed air (canned air) directly on the speaker mesh. The high pressure can blow the speaker diaphragm out, turning a cleaning job into a repair job.
The Soft Bristle Method: Use a clean, dry, soft-bristled toothbrush. Gently brush the speaker mesh horizontally. This helps dislodge dry dust.
The Painter’s Tape Trick: Roll a small piece of painter’s tape or masking tape (sticky side out) and gently dab the speaker grill. This can lift surface lint without pushing it deeper.
Adhesive Putty (Blu-Tack): This is a technician favorite. Press a small amount of adhesive putty into the speaker grill and pull it away quickly. The putty molds into the mesh holes and pulls out wax and dirt.
Software Checks
Sometimes, the “broken” speaker is actually a software glitch.
Check Bluetooth: Ensure your phone isn’t paired to headphones sitting in another room.
Volume Limits: Check your “Sound & Haptics” settings to ensure no volume limiters are active.
Restart the Device: It sounds cliché, but a hard reset clears temporary audio driver crashes.
If you have cleaned the mesh and checked the software, but the sound is still crackling or silent, the component has likely failed.
Liquid Damage
If your phone has been exposed to moisture, the speaker is often the first component to corrode because it is an open entry point. Liquid damage requires professional cleaning and often micro-soldering or component replacement.
The Repair Process
At iMobile Denver, replacing an ear speaker is a standard procedure, but it requires precision.
We carefully open the device to preserve water-resistance seals where possible.
We remove the logic board or display assembly to access the speaker module.
We test the new component before sealing the phone back up.
If you are worried about the cost of repairs, we offer options to help. You can apply for financing to manage the cost of premium repairs or device upgrades.
We value transparency. You can read more about our philosophy and team on our About Us page. We believe in fixing it right the first time.
Section 5: Conclusion
Your phone is your lifeline to the world, and being unable to hear callers disconnects you from that world. Whether it’s a simple case of “pocket lint buildup” or a blown speaker requiring technical intervention, diagnosing the issue is the first step toward a solution.
Don’t let a quiet phone ruin your day. If DIY cleaning doesn’t restore your audio clarity, our team is ready to assist.
Next Steps:
Try the cleaning methods listed above.
If the issue persists, contact us today to schedule a diagnostic.
Visit us in person! We are conveniently located to serve you. Find directions to our Sheridan Blvd, Denver shop here.
FAQs
Q1: Can I use a needle to clean my ear speaker holes?
A1: We strongly advise against this. Using a needle or pin can easily puncture the mesh and the fragile speaker diaphragm underneath, causing permanent damage. Stick to soft brushes or adhesive putty.
Q2: How much does an ear speaker repair cost?
A2: Costs vary by model. Older iPhones or Androids are generally cheaper to fix than the newest flagship models. Please contact us for a specific quote for your device.
Q3: Why does my speaker crackle only on high volume?
A3: This usually indicates a “blown” speaker where the material vibrating to create sound has a tear. It can handle low vibrations but distorts when pushed to high volume. This requires replacement.
Q4: Is ear speaker cleaning covered under warranty?
A4: Most manufacturer warranties (like AppleCare) do not cover “cleaning” services, though they cover hardware failure. However, at iMobile Denver, we can perform a professional cleaning for a fraction of the cost of a replacement.
Disclaimer: The information provided in this blog post is for educational purposes only. While we strive to provide safe DIY tips, attempting repairs on your own device may void manufacturer warranties or cause further damage if not done correctly. iMobile Denver is not responsible for damages resulting from DIY attempts. For safe, guaranteed results, always consult a professional technician.