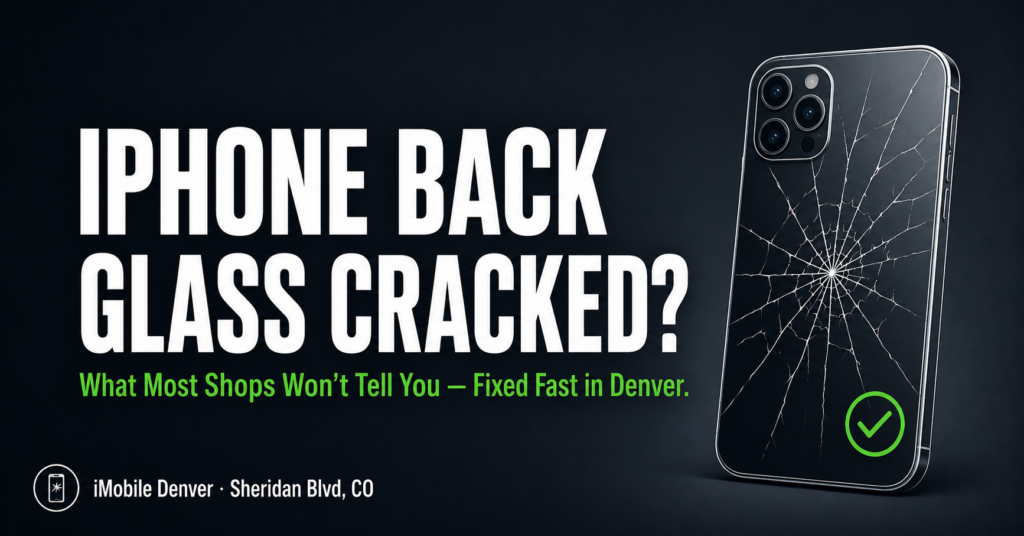
You dropped your iPhone and flipped it over to check the damage. The front screen looked fine. But the back? It was shattered.
Back glass damage is one of the most common iPhone repairs in Denver. Yet most people have no idea what their options are. And many shops either refuse to do it or charge prices close to a brand-new phone.
iPhone back glass repair is not as simple as a screen replacement. But it is absolutely worth doing — especially at the right shop. This guide explains what is really involved, why the repair costs what it does, and how to make the smartest decision for your device.
Section 1: Why iPhone Back Glass Breaks So Easily
It seems counterintuitive. Glass on the back of a phone — why is it even there?
Apple introduced glass backs with the iPhone 8. The reason was wireless charging. Wireless charging cannot pass through aluminum or metal, so Apple switched to glass. Since then, every iPhone model from the 8 onwards has used glass on the back.
The problem is simple. Glass shatters on impact. And back glass is thinner than front glass. It also has less protective framing around it compared to the front display.
On top of that, Denver’s altitude and temperature swings add stress. The glass expands slightly in summer heat and contracts in cold winters. Over time, this weakens the glass before any drop even happens.
So when you drop your iPhone — even from a short height — the back glass often takes the worst of it.
Section 2: Why Most Shops Avoid Back Glass Repair
Here is something most shops will not say out loud: back glass repair is difficult. That is why many shops either refuse it or charge extremely high prices.
The Problem With Apple’s Design
On iPhones 8 through 16, Apple fuses the back glass directly to the metal frame. There is no simple way to slide it off. Instead, a technician must either use a laser machine to separate the glass cleanly, or carefully remove it by hand using heat and precision tools.
Without a laser machine, removing the back glass risks damaging the wireless charging coil, the internal components, and the frame itself. That is a risk that inexperienced shops cannot afford to take.
The Cost of Doing It Right
A professional laser back glass repair machine costs thousands of dollars. Not every shop invests in one. So when you call around for back glass repair quotes and get wildly different prices, this is usually why.
Shops without the right equipment either refuse the job or quote high to cover the extra risk and labor involved. Additionally, some shops will try to replace the entire back housing — which means removing every internal component and reassembling them in a new chassis. That adds hours of labor and significant cost.
What This Means for You
It means you should not just go with the cheapest quote. Instead, ask the shop directly: do you use a laser machine for back glass removal? If the answer is no, look elsewhere.
At iMobile Denver, we handle iPhone repair with professional equipment and top-quality parts. You can get an instant quote for your specific iPhone model before you even walk through the door.
Section 3: Should You Repair It or Ignore It?
Many iPhone owners ask this question. The back is cracked, but the phone still works. Why bother?
Here are four strong reasons to get it fixed.
1. The Crack Will Spread
A single crack rarely stays small. Every time you set the phone down or put it in your pocket, pressure and friction extend the crack further. Within weeks, a small crack often becomes a fully shattered back.
2. Your Phone Loses Water Resistance
iPhones from the XR onwards carry an IP water-resistance rating. However, that rating depends entirely on the back glass being intact and sealed. A cracked back removes that protection completely. Therefore, even brief water exposure — rain, a wet counter — becomes a risk.
3. Sharp Glass Can Cause Cuts
Shattered back glass has sharp edges. These can cut your hands or tear through pockets and bags. This is a real safety concern, especially for kids using a parent’s phone.
4. Your Resale or Trade-In Value Drops
If you plan to sell or trade in your iPhone, a cracked back significantly reduces its value. In fact, many buyback programs reject phones with shattered backs entirely. A relatively affordable back glass repair can recover hundreds of dollars in trade-in value.
Section 4: What to Expect From iMobile Denver
At iMobile Denver on Sheridan Blvd, we repair back glass on all major iPhone models. Most repairs are completed the same day. In many cases, we can have your phone ready in 30 minutes or less.
We use quality parts that match the look and function of the original glass. Your wireless charging will still work. Your MagSafe will still work. The phone will feel like new in your hand again.
All repairs come with our standard warranty. So if anything is not right after the repair, we will take care of it.
You can also apply for financing if cost is a concern. Our financing option makes it easy to pay over time for larger repairs.
Additionally, if you have other damage on your phone at the same time — a cracked front screen, a weak battery, a damaged charging port — we can handle everything in one visit. There is no need to make multiple trips.
Check our repair services page to see every repair we offer. Or browse our FAQs if you have questions about the repair process before coming in.
Section 5: Conclusion and Final Thoughts
A cracked iPhone back glass is frustrating. But it is fixable. And the longer you wait, the worse it gets.
The key is choosing a shop that has the right equipment and experience. Not every shop does back glass repair properly. At iMobile Denver, we do.
Stop by our Sheridan Blvd location, get a quote online, or call us at (720) 224-5403. We also have a Spanish-speaking line at (720) 319-9262.
Your iPhone should look as good as it works. Let us fix it.
FAQs
Is iPhone back glass repair worth it? Yes, in most cases. It restores water resistance, removes the safety risk from sharp glass, and recovers resale value. The cost is almost always far less than buying a new phone.
How long does back glass repair take? At iMobile Denver, most back glass repairs are completed the same day. Many are done in 30 minutes or less.
Will my wireless charging still work after back glass repair? Yes. We take care to protect the wireless charging coil during the repair. After the fix, wireless charging and MagSafe work normally.
What iPhone models do you repair back glass on? We repair back glass on iPhone 8, X, XR, XS, 11, 12, 13, 14, 15, and 16 series. Get an instant quote to confirm pricing for your specific model.
Can I use a skin or case instead of repairing the back glass? A case can cover the cosmetic damage. However, it does not restore water resistance or stop the glass from cracking further. It also does not remove the sharp edge risk. Repair is the only real fix.
Do you offer financing for repairs? Yes. You can apply for financing directly on our website. It is a great option if you want to spread the cost of a larger repair.
Disclaimer
This article is for informational purposes only. Back glass repair complexity varies by iPhone model and damage level. iMobile Denver recommends an in-person assessment before any repair decision. Repair outcomes depend on the specific device condition. Contact us for a free diagnostic before proceeding with any repair.
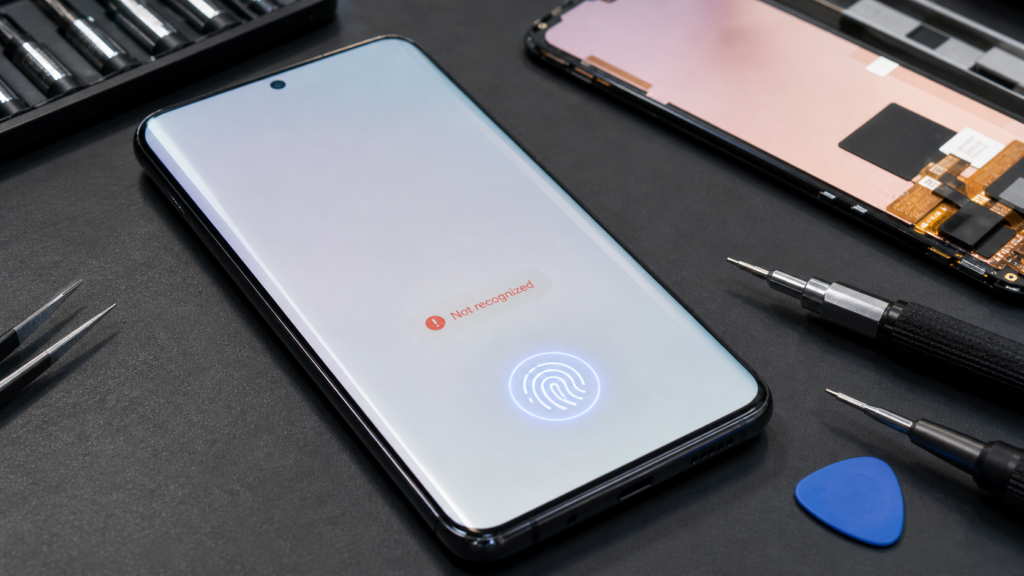
You get your screen replaced. Everything looks perfect — bright, clear, no cracks. Then you press your thumb to the display and nothing happens. No unlock. No response. Just a quiet prompt to use your PIN instead. If your fingerprint sensor not working after screen replacement is your current reality, you are not imagining it. And you are definitely not alone.
In 2026, under-display fingerprint sensors are built into the vast majority of Android flagships and a growing number of mid-range devices. They work beautifully — until a screen repair changes something underneath. This guide is built from real cases we handle at iMobile Denver every week. We will break down exactly why this happens, how to tell whether a software fix is all you need, and when the hardware genuinely needs another look.
Section 1: How Under-Display Fingerprint Sensors Actually Work
Before troubleshooting, it helps to understand what the sensor is doing in the first place. Under-display fingerprint sensors in 2026 fall into two main types: optical and ultrasonic.
Optical sensors function like a tiny camera behind the glass. When you press your finger to the screen, the OLED display flashes briefly, illuminates the fingerprint ridges, and captures an image through the panel. That image is then matched against a stored template. Optical sensors are common in mid-range phones and many budget Androids.
Ultrasonic sensors — like the Qualcomm 3D Sonic Max sensor used in Samsung flagship devices — work differently. They transmit sound waves through the display, build a three-dimensional ridge map of your fingertip, and verify it against a stored 3D profile. They are more accurate, more secure, and considerably more sensitive to physical changes in the display above them.
Both types depend on the OLED panel being optically and physically consistent with the factory-set calibration. Therefore, when that panel changes — even if the new one looks identical — the sensor’s ability to read through it shifts. That is the core reason fingerprint sensor not working after screen replacement is such a persistent issue in 2026. The sensor was calibrated for one specific piece of glass. You just gave it a different one.
Section 2: The Real Reasons Your Fingerprint Sensor Stops Working After Screen Replacement
In our shop, this failure almost always traces back to one of the following causes. Identifying the right one matters because it determines whether a quick software reset closes the case — or whether someone needs to open the phone again.
The Replacement Panel Has Different Optical Properties
This is by far the most common culprit. Not all OLED screens are manufactured identically. An aftermarket panel might match the resolution, brightness, and physical dimensions exactly — but if its glass thickness, light transmittance, or optical bonding adhesive differs even slightly from the original, the sensor cannot read through it accurately. The sensor’s calibration was written for a specific optical path. A panel with different properties is essentially a different lens placed over the same camera, and the result is a blurry read that the system rejects as unverified.
We have written about the broader pattern of mismatched parts causing delayed failures in our guide on hidden damage that shows up after a drop or repair. Fingerprint sensor failure is one of the subtler examples of exactly that.
Sensor Calibration Data Was Not Transferred
Some manufacturers store fingerprint sensor calibration data directly inside the display module. When a new screen is installed — even a genuine OEM replacement — that calibration data does not transfer automatically. Certain Samsung models, for instance, require this data to be rewritten to the new panel using diagnostic software that only authorized service partners can access. Without that step, the sensor is physically present and electrically connected, but it cannot interpret what it sees through the new glass.
This is why the skill of a repair technician matters as much as the quality of the parts. Swapping glass is only half the job on these devices.
A Connector Was Not Seated Properly
Under-display sensors connect to the motherboard via a ribbon cable or small flex connector routed behind the display assembly. During every screen repair, that connector gets disconnected and reconnected. If it was not seated perfectly — even a fraction of a millimeter off center — the sensor receives an intermittent or absent signal. The phone behaves as though the sensor simply does not exist.
This is usually one of the more straightforward hardware fixes. However, if the connector itself was torn during the repair, the situation becomes significantly more involved. For a sense of how small connection-level failures can cascade into major functional problems, our breakdown of the U4 IC issue causing 2026 phones to charge but not sync with a PC demonstrates the same logic applied to a different component.
Electrostatic Discharge or Moisture During the Repair
A small electrostatic discharge during the repair process can permanently damage the optical sensor or its driver chip without leaving any visible evidence. Similarly, moisture present in the phone before or during the repair can cause early corrosion on the sensor’s solder points. The failure might appear immediately or show up days later.
We covered this delayed-onset failure pattern in detail in our guide on why water-damaged phones often fail weeks after the initial incident. The same timeline applies here. A sensor that read your fingerprint fine on the first day after a repair can fail entirely by the end of the week if corrosion is progressing underneath.
A Software Pairing Mismatch After the Repair
Sometimes the phone itself is the obstacle. Certain Android builds in 2026 store biometric enrollment data that is paired to the hardware ID of the original display module. When a new screen is installed with a different hardware signature, the system treats the stored fingerprint data as potentially compromised and quietly disables biometric authentication until enrollment is cleared and redone. It looks exactly like sensor failure. However, it is actually a security check doing exactly what it was designed to do.
On iPhones, a similar pairing mechanism exists for Face ID — which we have covered in depth in our Face ID and Touch ID troubleshooting guide. The core principle is identical: the biometric system is tied to specific hardware, and swapping hardware breaks that pairing.
Section 3: How to Fix a Fingerprint Sensor Not Working After Screen Replacement
Work through these steps in order. Many cases resolve before you get to the end.
Step 1: Delete All Saved Fingerprints and Re-Enroll From Scratch
Go to Settings > Security > Fingerprints (or Biometrics and Security on Samsung) and delete every saved print. Then re-add your fingerprint with the new screen. The old enrollment data was captured through a different panel. Therefore, the reference image the sensor stored no longer matches what it can see through the replacement glass. Re-enrollment on the new screen gives the sensor a fresh reference to work with. This step resolves the problem more often than most people expect.
Step 2: Check for Any Pending Software or Firmware Update
Manufacturers frequently push compatibility patches for new display modules within days of release. If your phone had updates paused, had low storage, or was repaired shortly after a major OS release, it may be missing a patch that handles the sensor profile for your new screen. Check for updates immediately after any screen replacement and install them before drawing any conclusions about sensor failure.
Step 3: Inspect the Screen Edges for Any Gap or Lift
Run your fingernail carefully around the entire edge of the display, paying close attention to the area just above the home region where most sensors sit. If you feel even a small gap — even a hairline — the screen is not fully seated. A display that is not perfectly flush can shift the optical path just enough to cause consistent read failures. A technician can usually reseat and reseal it without replacing the screen again.
Step 4: Test Your Fingerprint at Multiple Angles and Pressures
Re-enroll the same finger at several different angles — not just one flat press. Under-display sensors recalibrated to a new panel sometimes recover partial function when enrollment captures more variation in the fingerprint image. This is not a permanent solution, but it confirms whether the sensor is reading at all or is completely unresponsive, which guides the next step.
Step 5: Return to the Repair Shop
If re-enrollment, updates, and a physical inspection do not solve the problem, the issue is hardware. Either the wrong panel was installed, calibration data was not written, or a component was disturbed during the repair. At that point, the job is not finished, and the shop should address it. A reputable repair center will reopen the phone at no additional charge to find the root cause.
A fingerprint sensor not working after screen replacement is not random, and it is not normal. It is the predictable result of replacing a component that an under-display sensor was precisely calibrated to read through, without accounting for the recalibration that specific sensors require. In 2026, with biometrics built into nearly every phone at every price point, this is one of the most important quality checks a repair shop should perform before handing your device back.
The good news is that in most cases, a fix exists. Re-enrollment resolves software pairing issues. Proper calibration tools resolve data mismatches. Reseating a connector resolves physical signal problems. The key is identifying which of those applies to your phone and making sure whoever works on it actually has the tools and knowledge to address it properly.
If your sensor failed after a recent repair, do not accept it as collateral damage. Push for answers. In most cases, the fix is right there — it just requires the right hands.
FAQs
Why did my fingerprint sensor stop working immediately after my screen was replaced?
The most common cause is that the replacement panel has slightly different optical properties than the original, which breaks the sensor’s calibration. Re-enrolling your fingerprints on the new screen is the first fix to attempt.
Will deleting and re-adding my fingerprint fix the problem?
Often, yes. Old fingerprint data was enrolled through a different display. Because the new panel changes the optical path, the sensor needs fresh reference data captured through the actual screen now installed.
Does a factory reset fix a fingerprint sensor that stopped working after a repair?
Sometimes. A factory reset clears biometric pairing data and forces a clean initialization. However, it will not fix a physically disturbed flex connector, incorrect panel calibration, or sensor component damage.
Can every repair shop recalibrate an under-display fingerprint sensor?
No. Ultrasonic sensor recalibration on Samsung flagships and certain other devices requires manufacturer-specific diagnostic software. Not every shop has access to it, which is why the calibration step is frequently skipped.
My fingerprint sensor works sometimes but fails most of the time after a screen repair — what does that mean?
Intermittent function usually points to a flex connector that is not fully seated, or a panel with marginal optical compatibility. A technician should reopen the device and inspect the sensor connection and panel seating before assuming the sensor itself has failed.
Disclaimer
This article is informational and reflects hands-on repair experience. It is not a substitute for a direct assessment of your specific device. If your phone requires hardware service following a screen repair, consult a qualified technician who can diagnose the actual failure before attempting additional repairs.
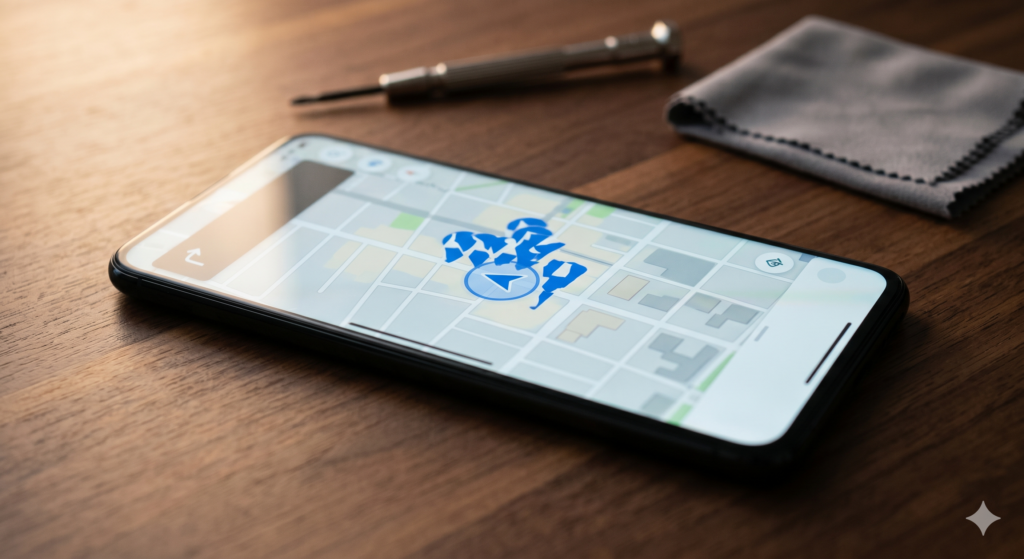
Is your phone GPS keeps losing location in the middle of a drive, or does it place you on the wrong street entirely? You are not alone. We see this issue almost every week at our Sheridan Blvd shop in Denver. People walk in frustrated because their navigation app sent them the wrong way, their fitness tracker stopped recording, or rideshare drivers can’t find them at pickup.
This guide will show you how to find the real cause, try the easy fixes first, and know when the problem lives inside the phone itself. Everything here comes from real bench work, not theory. Let us start with what is actually happening when GPS fails.
Section 1: Why Phone GPS Loses Location or Shows the Wrong Position
Your phone does not rely on satellites alone to find your location. Modern GPS is a blend of three systems working together. Real GPS satellite signals from space, Wi-Fi network triangulation from nearby routers, and cellular tower positioning from your carrier. According to NOAA’s official explanation of how GPS works, your phone needs a clear line of sight to at least four satellites for a precise fix.
The most common cause of GPS failure is a software glitch with the location services stack. After a major iOS or Android update, the GPS settings can get confused, and the phone keeps falling back to less accurate Wi-Fi positioning instead of using the GPS chip directly.
The second cause is hardware. The GPS antenna sits at the top edge of most phones, very close to the Wi-Fi and Bluetooth antennas. A cracked back glass, a bent frame from a drop, or a poorly done screen replacement can all damage or pinch the GPS antenna cable.
The third cause is environmental. Tall buildings, parking garages, and even heavy cloud cover can weaken satellite signals. This is normal, but the phone should recover within seconds. If yours does not, there is a real problem.
The fourth cause is a failing GPS chip itself. We see this more often on phones older than three years, especially after thermal stress damages the surrounding solder joints. This is similar to the kind of board-level wear we documented in our piece on NPU thermal cycle failures from 2026 AI agents.
Section 2: How to Fix Phone GPS Issues at Home (Step by Step)
Run through these steps in order. Most people fix the problem before the last step.
Step 1: Toggle Location Services Off and On
Open Settings, find Location Services or Location, turn it off, wait 10 seconds, then turn it back on. This forces the GPS stack to reload from scratch. It sounds basic, but we fix at least two phones a week with just this step.
Step 2: Restart Your Phone
Hold the power button and restart. This clears any cached location data and forces the GPS module to do a fresh satellite acquisition.
Step 3: Check App-Level Permissions
Go into Settings, Privacy or Privacy & Security, then Location Services. Make sure the app you are using has “While Using” or “Always” permission. Sometimes a permission gets reset to “Never” after an update without warning.
Step 4: Step Outside and Test
Walk to an open area away from buildings, trees, and tall structures. Open a navigation app and wait 30 to 60 seconds. If the location locks accurately outside but not indoors, the issue is environmental, not your phone.
Step 5: Disable VPN Temporarily
Many users do not realize their VPN is actively interfering with location-based features. Turn off any active VPN and test again. If GPS works without the VPN, you have your answer.
Step 6: Reset Location and Privacy Settings
On iPhone go to Settings, General, Transfer or Reset, Reset, then Reset Location & Privacy. On Android the path is usually under Settings, System, Reset Options, then Reset Wi-Fi, Mobile & Bluetooth. This wipes corrupted GPS calibration data without affecting your photos, apps, or contacts.
Step 7: Update Your OS and Maps Apps
Open the App Store or Play Store and check for pending updates. GPS-related bugs are some of the most patched issues in modern phone updates.
Step 8: Recalibrate the Compass (Apple Maps and Google Maps)
Open Maps, tap the location dot, and you will see a calibration prompt. Hold the phone level and move it in a figure-eight motion several times. A miscalibrated compass is one of the top causes of phones showing the right location but wrong direction.
Section 3: How to Get GPS Hardware Repaired Safely
If the steps above did not help, the GPS antenna or chip is likely the issue. Here is how to handle it the right way.
Get a proper diagnostic first. A failing GPS can hide deeper hardware problems. The same antenna assembly often handles GPS, Wi-Fi, and Bluetooth, so a single damaged cable can affect all three. A good shop tests each system separately before quoting any repair.
Check for prior drops or back glass damage. If your phone has been dropped recently, especially on its top edge, the GPS antenna cable is the first thing we check. A small dent or bent corner can pinch the cable enough to kill the signal without anything looking obviously wrong from outside.
Watch out for screen replacement issues. A poorly done screen replacement can pinch the GPS antenna cable that runs along the top of the phone. We see this often when customers come in after getting work done elsewhere. This relates closely to the kinds of post-repair issues we covered in our piece on the data deadlock and U4 IC failures.
Avoid DIY antenna kits. GPS antenna replacement requires removing the screen, the battery, and reaching into the top of the device where flex cables are densely packed. We see at least one botched DIY job a month. Bent connectors, torn coaxial cables, and severed antenna pads are all common.
Consider a full diagnostic at our shop. For most people, a professional GPS diagnostic takes under 20 minutes. Our iPhone repair team and Samsung repair specialists handle GPS and antenna repairs regularly. You can get an instant quote before deciding, and we will always tell you straight whether a fix is worth the cost.
Section 4: Conclusion and Final Thoughts
If your phone GPS keeps losing location or showing the wrong position, the cause is almost always a software glitch, a permissions issue, an interfering VPN, or a damaged antenna. The good news is that the first three causes have clear DIY fixes. Toggle location services, check app permissions, recalibrate the compass, and step outside to test in clear sky.
The most important thing is to test in multiple locations before assuming the phone is broken. We see customers come in convinced they need a chip-level repair, only to find out the issue was a stuck VPN setting or a misconfigured permission. Always rule out the easy stuff first.
If you are in the Denver area and the GPS problem follows your phone everywhere, even outdoors with a clear sky, bring it in. We will run a proper diagnostic, show you what is actually happening, and give you honest options. Same-day repairs are possible for most antenna issues, and we offer a 30-day warranty on every repair.
FAQs
Q: Why does my GPS work in some apps but not others?
That is almost always a permission issue. Each app needs its own location permission, and one app having it does not mean the others do. Check each app’s permission individually under Settings.
Q: Can a screen protector affect GPS accuracy?
No. The GPS antenna is internal and not blocked by glass or plastic on the front of the phone. If a new screen protector seems to have caused GPS issues, the real cause is usually a misaligned screen replacement underneath.
Q: How much does a phone GPS antenna repair cost in 2026?
For most models, a GPS antenna or cable replacement is one of the more affordable repairs, often under $100. A full GPS chip replacement at the board level costs significantly more because it requires micro-soldering. We always quote upfront after a diagnostic.
Q: Will airplane mode fix a stuck GPS?
Sometimes. Toggling airplane mode on for 30 seconds and then off forces the phone to re-register with cellular and re-acquire GPS from scratch. It is worth trying before more drastic steps.
Q: My GPS works fine outdoors but never indoors. Is that normal?
Yes, mostly. GPS satellite signals do not penetrate concrete or metal well. Modern phones supplement GPS indoors with Wi-Fi and cellular triangulation, but accuracy drops to 30 to 100 meters indoors versus 3 to 5 meters outdoors with a clear sky.
Disclaimer
This article is for informational purposes only and reflects observations from our Denver repair shop. GPS behavior varies by device, environment, and software version. For specific issues, consult the original manufacturer or a trusted local repair professional.
Nobody thinks twice about a phone case. You pick one that looks good, feels right in the hand, and protects against drops. Maybe you splurge on a rugged option. Maybe you go ultra-thin because you hate bulk. Either way, the case goes on and stays on — usually for the life of the device.
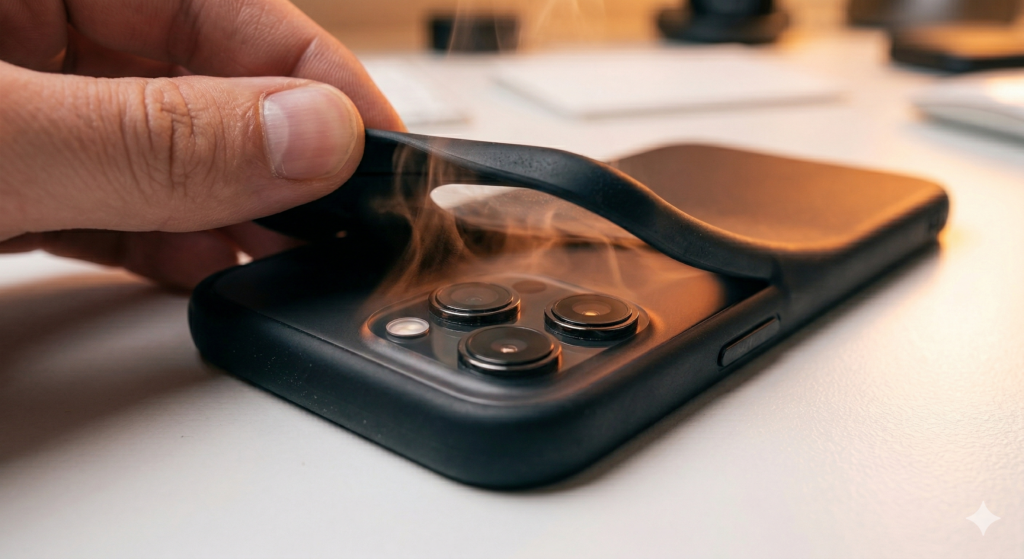
But here’s something most people never consider: your phone case directly affects how well your device manages heat. And in 2026, with processors running hotter than ever and phone bodies getting thinner by the generation, the wrong case doesn’t just trap warmth. It actively contributes to phone case heat dissipation failure that can warp internal components, degrade solder joints, and slowly strangle the logic board.
At iMobile Denver, we started noticing this pattern in late 2025. Customers brought in phones with warped frames, intermittent shutdowns, and failing components. No water damage. No major drops. The common denominator? Ultra-tight, poorly ventilated cases that turned their phones into pocket-sized ovens. This guide explains exactly how case design affects thermal management, what kind of internal damage results, and how to protect your device without giving up protection.
Section 1: Why Phone Heat Management Matters More in 2026 Than Ever Before
The Thermal Design Reality of Modern Flagships
Every flagship phone generates significant heat during normal use. The processor, modem, display driver, and battery all produce thermal energy. Manufacturers design the phone body itself — typically aluminum and glass — to act as a passive heat sink. Heat travels from the logic board through thermal paste and graphite sheets to the metal frame, then radiates outward through the exterior surfaces.
This system works when those exterior surfaces can actually radiate heat into the surrounding air. The moment you wrap the phone in an insulating layer, you reduce that radiation. A thin case slows heat escape. A thick, tightly sealed case blocks it almost entirely.
Why 2026 Phones Run Hotter Than Previous Generations
Three converging trends make thermal management harder this year.
On-device AI never stops. As we covered in our post on NPU thermal cycle failures, persistent AI workloads keep processors engaged at moderate heat levels for hours. The phone never fully cools between tasks.
5G modems generate constant background heat. Maintaining a 5G connection — especially switching between mmWave and sub-6 bands — requires continuous radio power. Our guide on 5G signal hardware problems explains how modem heat contributes to overall thermal load.
Thinner phone bodies reduce thermal mass. Less metal and glass means less material to absorb and distribute heat. The phone reaches peak temperature faster and stays there longer.
Add an insulating case to that equation and temperatures climb even higher. The phone throttles. Performance drops. And inside, the heat starts doing real damage.
Section 2: How the Wrong Case Creates a Heat Trap That Damages Your Phone
The Insulation Effect of Ultra-Thin and Sealed Cases
Not all cases cause problems equally. The worst offenders share specific design traits:
Silicone or rubber cases with full back coverage. These materials insulate rather than conduct. They trap the heat the phone body tries to radiate. The back panel — your phone’s primary cooling surface — can’t breathe.
MagSafe cases with thick magnetic rings. The metal ring improves accessory alignment but adds a localized heat source when used with wireless chargers. Combined with case insulation, the area around the charging coil gets dangerously warm.
Wallet cases and folio designs. These cover both the front and back of the phone. Heat has nowhere to escape. We’ve measured surface temperature differences of 8 to 12°C between a cased and uncased phone running the same workload.
Tightly molded cases with zero air gap. Cases that press firmly against every surface eliminate the thin air buffer that helps convection cooling. Even a fraction of a millimeter of air gap makes a measurable difference in heat dissipation.
What Happens Inside When Heat Can’t Escape
When a phone runs consistently 5 to 10 degrees hotter than its design intended, the damage accumulates across multiple components:
Logic board warping. The printed circuit board (PCB) that holds every chip in your phone consists of layers of fiberglass and copper traces. Sustained heat causes these layers to expand unevenly. Over months, the board develops a subtle bow. That warp stresses solder joints. Chips lose reliable contact with their connection points. The result? Intermittent failures that come and go unpredictably.
Accelerated solder joint fatigue. Higher operating temperatures mean larger thermal expansion cycles. Solder joints that would survive five years under normal conditions fail in two. We see this frequently when customers bring in phones with random restarts or display flickering — symptoms that trace back to weakened connections on a heat-stressed board.
Battery degradation. Lithium-ion batteries lose capacity faster at higher temperatures. A phone that consistently runs 8°C hotter than designed ages its battery roughly 30% faster. Customers notice battery drain accelerating — then bring the phone in thinking the battery failed on its own. In reality, the case contributed significantly.
Adhesive breakdown. Internal adhesives hold components like the display, back glass, and battery in place. Heat softens these adhesives over time. Screens lift slightly at the edges. Back panels loosen. In extreme cases, a softened battery adhesive allows the cell to shift position and press against other components.
Section 3: How to Choose a Case That Protects Without Strangling Your Phone
What to Look For in a Thermally Safe Case
Drop protection and thermal management aren’t mutually exclusive. Good case design accounts for both.
Raised edges with open ventilation. Cases that lift slightly away from the phone body at the back create an air gap. This allows passive convection — warm air rises away from the surface and cooler air replaces it. Even a 0.5mm gap makes a difference.
Hard-shell materials over soft silicone. Polycarbonate and hard TPU conduct heat better than soft silicone or rubber. They still absorb impact but don’t insulate the phone as aggressively.
Open bottom and top cutouts. Cases that leave the speaker grilles, charging port, and top edge exposed allow heat to escape from multiple points. Fully enclosed designs trap heat from every direction.
Avoid stacking magnetic accessories. MagSafe wallet plus battery pack plus case creates three insulating layers behind the phone. Each one compounds the heat retention. If you must use magnetic accessories, remove them during heavy use or charging.
When to Take the Case Off Entirely
During any extended high-performance task — gaming, video editing, GPS navigation, or video calls longer than 20 minutes — remove the case. Let the phone’s metal and glass body do what it was designed to do. You can put the case back on when the task ends.
If you charge wirelessly, remove the case during charging. Wireless charging generates more heat than wired charging. Adding case insulation on top of that pushes temperatures into the danger zone.
Signs Your Case Already Caused Damage
Watch for these symptoms. Any combination suggests heat-related internal stress:
Battery health dropping faster than expected for the phone’s age
Random restarts that increase in frequency over weeks
The phone feeling unusually warm even during light tasks — with the case on
If any of these match, bring the phone in for a diagnostic. Our iPhone repair and Samsung repair teams check for board warping, solder fatigue, and thermal damage as part of every assessment.
Section 4: Conclusion and Final Thoughts
A phone case should protect your device. It shouldn’t slowly cook it from the inside. But in 2026 — with hotter processors, persistent AI workloads, 5G modems, and increasingly thin phone bodies — the wrong case turns a manageable thermal load into a destructive one.
Logic board warping doesn’t happen overnight. Solder fatigue builds gradually. Battery degradation accelerates quietly. By the time symptoms appear — random restarts, failing sensors, rapid battery drain — months of cumulative heat damage already occurred inside the case.
The fix isn’t complicated. Choose cases with air gaps and hard-shell materials. Avoid stacking insulating accessories. Remove the case during heavy tasks and wireless charging. Monitor battery health as an early warning indicator.
And if your phone already shows symptoms, don’t dismiss them as “just getting old.” A professional diagnostic at iMobile Denver can distinguish between normal wear and heat-related component failure. Catching thermal damage early often means a targeted repair rather than a full replacement.
Not through impact — that’s what cases prevent. But a poorly ventilated case traps heat the phone generates during normal use. Over months, sustained elevated temperatures weaken solder joints, degrade batteries, and warp the logic board. The case doesn’t cause a single catastrophic failure. It creates a slow accumulation of thermal stress that eventually produces symptoms.
Which case materials trap the most heat?
Soft silicone and rubber rank worst for heat retention. Leather folio cases come second because they cover both sides. Hard polycarbonate and rigid TPU cases perform better because they conduct rather than insulate. Metal cases can actually help dissipation — but watch for interference with wireless signals.
Does wireless charging make the case heat problem worse?
Yes. Wireless charging generates more heat than wired charging. A case trapping that heat against the back panel pushes internal temperatures higher. Always remove the case during wireless charging, or at minimum use a case specifically designed with wireless charging ventilation in mind.
Repair and Damage Questions
How do I know if my logic board warped from heat?
Warped boards produce intermittent, inconsistent symptoms. Random restarts, sensors that fail then work again, or connections that cut in and out all suggest stressed solder joints from board deformation. A technician uses magnification and thermal imaging to identify warping and micro-fractures. Bring it to our Denver shop for inspection.
Can heat damage from a case void my warranty?
Manufacturer warranties typically don’t cover damage from third-party accessories. If Apple or Samsung determines that a case contributed to thermal damage, they may classify it as accidental damage. Independent repair shops like iMobile Denver repair heat-related failures regardless of cause — and at a fraction of manufacturer pricing.
Should I stop using a case entirely?
Not necessarily. Cases still protect against drops, scratches, and daily wear. The goal is choosing a case that protects without insulating. Look for hard-shell designs with raised backs, ventilation channels, and open cutouts. Remove it during heavy use and wireless charging. That balance gives you drop protection without the thermal penalty.
You dropped your phone. Nothing dramatic — it slipped off the couch, bounced off a car seat, or tumbled out of your pocket onto a sidewalk. The screen looks fine. No cracks. No visible damage. But now Night Mode photos come out blurry and flat. Augmented reality apps can’t map your room. Portrait mode produces muddy depth separation that used to look razor sharp.
When your phone’s LiDAR is not working after a drop, the connection between cause and effect isn’t obvious. Most people blame a software glitch or a camera update. They restart the phone, clear the camera cache, or factory reset — none of which helps. Because the LiDAR scanner sits behind a tiny window on the back of your phone, and even a minor impact can knock it out of alignment without leaving a single visible mark.
At iMobile Denver, we’ve diagnosed this exact failure pattern across dozens of flagship devices since LiDAR became standard on pro models. The sensor looks untouched from the outside. But inside, the precision alignment that makes depth sensing work shifted by fractions of a millimeter — enough to break Night Mode, AR, and portrait photography all at once. This guide explains what LiDAR does, why drops damage it so easily, and what repair actually involves.
Section 1: What LiDAR Does in Your Phone and Why It Matters More Than You Think
The Technology Behind the Tiny Sensor
LiDAR stands for Light Detection and Ranging. Your phone’s LiDAR scanner fires thousands of invisible infrared laser pulses per second. These pulses bounce off objects in front of the camera and return to a sensor that measures how long each pulse took to travel back. From those timing measurements, the phone builds a precise 3D depth map of the scene.
This depth map powers several features you probably use without realizing LiDAR is involved.
Features That Depend on LiDAR Working Correctly
Night Mode and low-light photography. The depth map helps the camera system focus faster and more accurately in darkness. Without it, the autofocus hunts and guesses. Photos come out softer. Focus locks on the wrong plane. The dramatic improvement Night Mode delivers on pro models comes partly from LiDAR data — not just computational photography.
Portrait Mode depth separation. LiDAR provides the accurate edge detection that separates your subject from the background. When the scanner misaligns, Portrait Mode loses precision. Hair blends into the blur. Edges look artificial and jagged. The “professional camera” effect falls apart.
Augmented reality applications. AR apps like measuring tools, furniture placement viewers, and gaming overlays rely entirely on the depth map. A misaligned LiDAR scanner delivers inaccurate spatial data. Objects float above surfaces. Measurements read wrong. AR games glitch and lose tracking.
Face ID accuracy (on some models). Certain flagship phones share components between the rear LiDAR scanner and the front-facing depth sensor array. Damage to one system can affect calibration data that the other references. We’ve seen cases where a rear LiDAR failure coincided with intermittent Face ID problems — a connection most users never suspect. Our post on proximity sensor troubleshooting covers similar front-facing sensor calibration issues.
Section 2: Why Minor Drops Damage LiDAR When Nothing Else Breaks
The Precision Problem
A phone screen can absorb significant impact. Modern glass is designed to flex and distribute force. The frame bends slightly and springs back. Internal components mount on shock-absorbing gaskets and flex cables with slack.
LiDAR doesn’t get those luxuries. The scanner requires near-perfect optical alignment between the laser emitter and the infrared receiver. These components mount rigidly — any flex would distort the depth measurements. That rigidity makes LiDAR accurate. It also makes it fragile.
A drop that barely scuffs the phone case can transmit enough shock through the chassis to shift the LiDAR module by a fraction of a millimeter. The emitter and receiver fall out of sync. Laser pulses leave at one angle and return to a sensor that no longer expects them at that position. The depth map degrades or fails entirely.
What We See During Diagnostics
At our Sheridan Blvd. location, LiDAR-related diagnostics follow a consistent pattern. The customer says Night Mode “got worse” or AR “stopped working.” They don’t connect it to a drop that happened days or weeks earlier because nothing looked broken.
We open the device and find one of three things:
The LiDAR module shifted on its mounting bracket. The adhesive or screws holding the module loosened from impact shock. The module physically moved. Repositioning and resecuring it restores function.
The infrared window cracked internally. The tiny glass or sapphire window covering the LiDAR sits flush with the camera housing. It can fracture behind the surface without any visible damage outside. A cracked window scatters the infrared pulses and corrupts the return signal.
The flex cable connecting the LiDAR module to the logic board partially unseated. Just like the display flex cable, the LiDAR connector uses a small pressure-fit plug. Impact can pop it partially loose. Data transmission becomes intermittent — the scanner works sometimes and fails randomly other times.
These failures don’t produce error messages. The camera app simply delivers worse results. Most users assume the software degraded, not the hardware.
Section 3: How to Diagnose and Fix LiDAR Problems After a Drop
Quick Tests You Can Run at Home
Before bringing your phone in, try these checks to confirm the LiDAR scanner is the issue:
Test AR functionality. Open the Measure app (iPhone) or any AR app (Android). Point the camera at a flat surface. If the app can’t detect the surface, takes much longer than usual, or produces wildly inaccurate measurements, the depth sensor isn’t feeding reliable data.
Compare Night Mode to a known-good device. Take the same low-light photo with your phone and a friend’s identical model. If yours consistently produces softer focus or slower autofocus lock, the LiDAR-assisted focusing system is underperforming.
Check Portrait Mode edges. Take a portrait photo of someone with detailed hair. Zoom in on the edge between the subject and the blurred background. If the separation looks rough, jagged, or cuts into the subject’s outline, the depth map lost accuracy.
Look for the infrared emitter. Open the camera in a dark room and look at the LiDAR window through another phone’s front camera. You should see a faint grid of infrared dots. If the dots appear scattered, dim, or absent on one side, the emitter or window is damaged.
When Professional Repair Makes Sense
If those tests confirm a problem, software fixes won’t help. The damage is physical. Restarting the phone, updating iOS or Android, or resetting camera settings addresses nothing when the sensor shifted or cracked.
At iMobile Denver, LiDAR repair involves opening the device, inspecting the module alignment, checking the infrared window, and testing the flex cable connection. If the module simply shifted, repositioning it and reinforcing the mount takes under an hour. A cracked infrared window requires a replacement part. A damaged flex cable gets swapped.
For Samsung flagship devices with depth-sensing cameras (like the Galaxy S and Note Ultra series), the process is similar but uses different sensor architectures. Our smartphone repair team handles both ecosystems.
The key is catching the problem early. A shifted LiDAR module that sits misaligned for months can eventually damage the flex cable from sustained uneven pressure. What starts as a $50 to $80 realignment becomes a more involved repair if neglected.
LiDAR transformed what smartphone cameras can do. Night Mode on pro-model phones produces photos that rival dedicated cameras in low light. AR applications map physical spaces with centimeter-level accuracy. Portrait Mode creates depth separation that looks genuinely professional. All of that depends on a tiny sensor maintaining precise optical alignment — alignment that a minor drop can silently destroy.
The frustrating part is how invisible the damage looks. No cracked screen. The lens looks fine. Not a single error message tells you what happened. Just gradually worse photos, broken AR tracking, and a vague feeling that your camera “isn’t as good as it used to be.”
If your flagship phone’s Night Mode, Portrait Mode, or AR features degraded — especially after any kind of drop, bump, or impact — don’t waste time reinstalling apps or resetting settings. The LiDAR scanner almost certainly needs physical inspection.
Stop by our Denver location or contact us for a diagnostic. We’ll tell you exactly what shifted, what broke, and what it takes to restore your camera system to full capability. Most LiDAR repairs finish same-day, and every repair comes with our standard warranty.
iPhones starting with the iPhone 12 Pro and all subsequent Pro/Pro Max models include LiDAR. On Android, Samsung Galaxy Ultra models and certain Google Pixel Pro models use depth-sensing cameras with similar functionality. Check your phone’s spec sheet or look for a small dark circle near the rear camera lenses — that’s the infrared window.
Can a phone case prevent LiDAR damage from drops?
A case absorbs some impact force, which helps. But LiDAR damage comes from internal shock transmission through the chassis, not from direct contact with the sensor window. A case reduces the severity of the shock but can’t eliminate it entirely. It’s still good protection — just not a guarantee.
Why didn’t my phone show any error after the drop?
Phones don’t monitor LiDAR alignment in real time. The sensor either sends data or it doesn’t. A partially misaligned scanner still sends data — just inaccurate data. The camera app doesn’t know the depth map is wrong. It processes whatever the scanner provides and delivers degraded results without any warning.
Repair Questions
How much does LiDAR repair cost?
It depends on the phone model and the specific damage. A simple module realignment costs less than a window or flex cable replacement. Get an instant quote for your exact device and situation.
Will a camera replacement fix LiDAR problems?
Not necessarily. The LiDAR scanner and the main camera are separate modules. Replacing the camera lens won’t fix a shifted or cracked LiDAR sensor. A proper diagnostic identifies which component failed so you don’t pay for parts you don’t need.
Does LiDAR damage get worse over time?
It can. A shifted module puts uneven stress on its flex cable and mounting points. Vibrations from daily use, temperature changes, and subsequent minor impacts can worsen the misalignment. What starts as slightly soft Night Mode photos can progress to complete AR failure if left unaddressed for months.
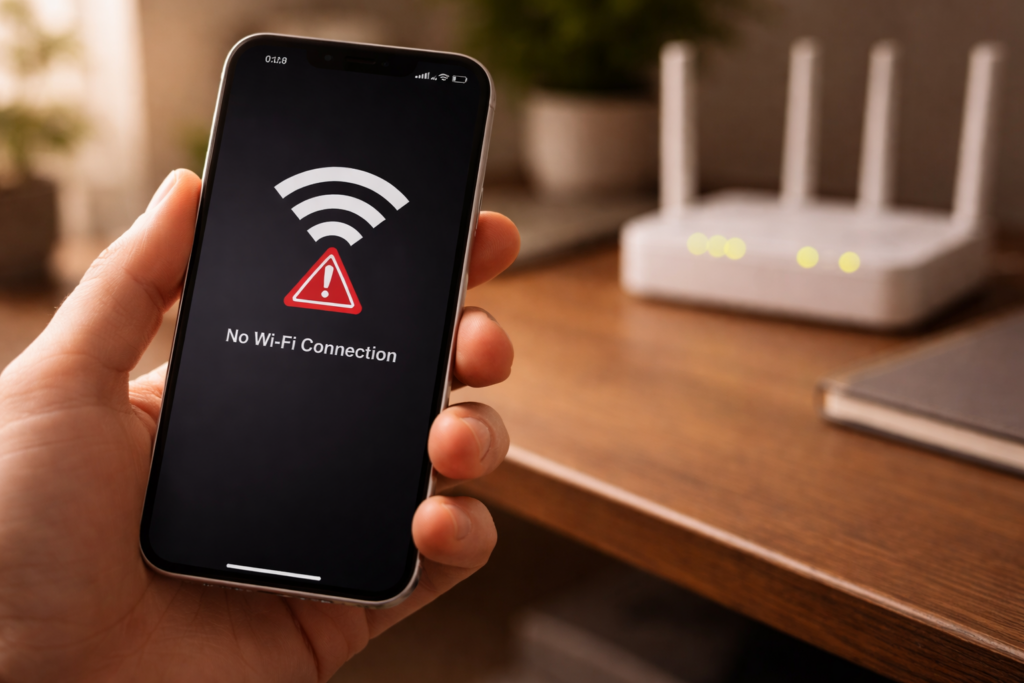
Few things are more maddening than watching your laptop, tablet, and smart TV all hum along on Wi-Fi — while your phone sits there stubbornly refusing to connect. You’ve restarted it a dozen times. Airplane mode has been toggled on and off more than you’d care to admit. Maybe you’ve even yelled at the thing a little. And still, nothing. If your phone won’t connect to Wi-Fi even though every other device in your house is online, you’re not dealing with a router problem. The issue lives inside the phone itself. And the good news? Most of the time it’s fixable.
At iMobile Denver, we see this issue walk through our doors multiple times a week. After years of hands-on diagnostics, we’ve learned that the cause usually falls into a handful of categories — some software, some hardware, and a few that surprise people. This guide breaks down the real reasons your phone might be refusing Wi-Fi and exactly what to do about each one.
Section 1: Why Your Phone Specifically Loses Wi-Fi While Other Devices Stay Connected
Before you start factory resetting anything, it helps to understand why this happens to one device and not the rest.
How Your Phone’s Wi-Fi Connection Actually Works
Every device on your network negotiates its own individual connection with your router. Your phone has its own Wi-Fi antenna, its own network chipset, and its own software stack handling that handshake. So when something goes wrong on your phone’s end — whether it’s a corrupted network profile, a software glitch, or a damaged antenna — it has zero effect on your other devices.
The Most Common Root Causes
Here are the most common root causes we identify during smartphone repair appointments:
Corrupted saved network data. Your phone stores Wi-Fi credentials and connection parameters. Sometimes that saved profile gets corrupted after an update or unexpected restart, and the phone just silently fails to connect.
IP address conflict. If another device grabbed the same local IP your phone was using, the router may reject your phone’s connection attempt. This happens more often than people think, especially on crowded home networks.
Outdated or buggy firmware. A bad OS update can break Wi-Fi drivers. We’ve seen this repeatedly with both iPhones and Samsung Galaxy devices after major version releases.
Physical antenna damage. Drops, water exposure, or even a previous screen repair done incorrectly can disturb the internal Wi-Fi antenna. This is the scenario most people don’t consider, but it’s surprisingly common. If your phone recently had any kind of physical damage, our iPhone repair and Samsung repair teams can inspect the antenna connections during a diagnostic.
Understanding which of these applies to your situation makes the difference between wasting an hour on Google and actually solving the problem.
Section 2: Step-by-Step Troubleshooting When Your Phone Won’t Connect to Wi-Fi
Let’s walk through fixes in order, from quickest to most involved. Try each one before moving to the next.
Step 1: Forget the Network and Reconnect
Go to your Wi-Fi settings, tap on your home network, and select “Forget.” Then reconnect by entering the password fresh. This clears the saved profile and forces your phone to negotiate a completely new connection. It solves the issue roughly 30–40% of the time in our experience.
Step 2: Reset Your Network Settings
On iPhone, go to Settings > General > Transfer or Reset iPhone > Reset > Reset Network Settings. On Android, it’s typically under Settings > System > Reset Options > Reset Wi-Fi, Mobile & Bluetooth. This wipes all saved networks, Bluetooth pairings, and VPN configs. It’s more aggressive than Step 1 but catches deeper software corruption.
A heads up — you’ll need to re-enter passwords for every Wi-Fi network after doing this.
Step 3: Check for Software Updates
Manufacturers regularly patch Wi-Fi connectivity bugs. If you’ve been postponing that system update notification, now is the time. Apple and Google both document known Wi-Fi bugs in their release notes, and sometimes a simple update is the entire fix.
Step 4: Toggle MAC Randomization Off
Modern phones randomize their MAC address for privacy. Occasionally, this confuses certain routers — particularly older ones or those provided by ISPs. Go to your Wi-Fi network’s advanced settings and switch to “Use Device MAC” instead of a randomized one. We’ve seen this fix connectivity on dozens of devices where nothing else worked.
Step 5: Boot Into Safe Mode
Android users can restart in Safe Mode (hold the power button, then long-press “Power Off” until Safe Mode appears). If Wi-Fi works perfectly in Safe Mode, a third-party app is interfering — typically a VPN, ad blocker, or battery optimization tool. Remove recently installed apps one by one until you find the culprit.
iPhone users don’t have a traditional Safe Mode, but you can test by going to Settings > VPN and disabling any active VPN profiles.
Step 6: Try a Different Wi-Fi Band
If your router broadcasts both 2.4GHz and 5GHz networks with different names, try connecting to the one you aren’t currently using. Some phones have intermittent issues with one band but work fine on the other. This can at least get you connected while you work on a permanent fix.
For a deeper dive into connectivity-related hardware failures, our post on why 5G phones keep dropping to “No Service” covers the antenna and modem-level issues that affect wireless connections broadly.
Section 3: When Software Fixes Don’t Work — Recognizing a Hardware Problem
Here’s the honest part that most online guides skip: sometimes the problem isn’t software at all.
If you’ve gone through every step above and your phone still won’t connect to Wi-Fi — or it connects but drops constantly, or shows an absurdly weak signal while standing next to the router — there’s a good chance you’re looking at a hardware fault.
Common Hardware Culprits
Damaged or disconnected Wi-Fi antenna flex cable. Inside your phone, the Wi-Fi antenna connects to the logic board through a tiny flex cable and connector. A drop can pop it loose, and even a poor-quality screen replacement can pinch or tear it. We regularly find this during diagnostics at our Denver repair shop, and reconnecting or replacing the flex cable usually resolves the issue within minutes.
Corroded or water-damaged Wi-Fi chip. Water exposure doesn’t always kill a phone outright. Sometimes it corrodes individual components over weeks. The Wi-Fi and Bluetooth chip is particularly vulnerable because of its position on the logic board in many phone models. If your phone was exposed to moisture even months ago, this could be the culprit.
Faulty logic board solder joints. On older devices or phones that have been through extreme temperature changes, micro-fractures in solder joints can cause intermittent connectivity loss. This is a board-level repair and requires professional micro-soldering.
When to Seek Professional Help
If none of the software troubleshooting above made a difference, it’s time to bring the phone in for a physical inspection. Continuing to mess with settings at that point is just spinning your wheels. A professional diagnostic can identify the exact failed component — and in many cases, the repair is quicker and cheaper than people expect.
According to the FCC’s guide on wireless device interference, physical obstructions and hardware faults remain leading causes of device-specific connectivity failure — so you’re not imagining things if your phone is the only one struggling.
Section 4: Conclusion and Final Thoughts
A phone that won’t connect to Wi-Fi when everything else is working fine is almost always a phone-level issue — not a network one. That’s actually the reassuring part. It means the problem has a specific cause and, in most cases, a straightforward solution.
Start with the software basics: forget the network, reset your network settings, check for updates, and rule out app interference. These steps resolve the majority of cases we see. But if the problem persists — especially after a drop, water incident, or screen repair — the answer is almost certainly hardware-related. A loose antenna cable, corroded chip, or damaged connector won’t fix itself with a reboot.
The worst thing you can do is ignore it and assume it’ll go away. Wi-Fi issues caused by hardware tend to get worse over time, not better. Getting a professional repair evaluation sooner rather than later can save you money and prevent data loss from more aggressive DIY attempts like factory resets.
If you’re in the Denver area, reach out to our team — we’ll tell you straight whether it’s something you can fix at home or something we need to open up and look at.
FAQs
Why does my phone say “connected” to Wi-Fi but have no internet?
This typically means your phone successfully authenticated with the router, but the router isn’t passing internet traffic to your device. It’s often an IP conflict or a DNS issue. Try forgetting the network and reconnecting, or manually set your DNS to 8.8.8.8 (Google’s public DNS) in your Wi-Fi settings.
Can a cracked screen cause Wi-Fi problems?
Not the crack itself — but the repair can. If a screen replacement was done improperly, the technician may have disconnected or damaged the Wi-Fi antenna cable that runs near the display assembly. We see this more often than you’d think, which is one reason quality repairs from experienced technicians matter.
Does a phone case block Wi-Fi signal?
Most standard cases don’t cause issues. But heavy-duty metal cases or cases with magnetic mounts can interfere with wireless signals. If you’re troubleshooting, try removing your case entirely and testing the connection bare.
Should I factory reset my phone to fix Wi-Fi?
A factory reset should be a last resort, not a first step. It wipes all your data and apps and doesn’t fix hardware problems. Try the less destructive steps in this guide first — resetting network settings alone solves the problem for most people without touching your photos, apps, or messages.
How do I know if my phone’s Wi-Fi antenna is broken?
The biggest clue is weak signal strength even when you’re standing right next to the router, or Bluetooth also acting unreliable (since Wi-Fi and Bluetooth often share the same chip). If both wireless functions are struggling, there’s very likely a hardware fault. A quick diagnostic at a repair shop like ours can confirm it in minutes.
This guide is based on real-world repair experience at iMobile Denver. While these troubleshooting steps resolve the majority of Wi-Fi connectivity issues, every device is different. If you’re unsure about opening your phone or performing any hardware-level fix, we always recommend consulting with a qualified repair professional to avoid further damage.
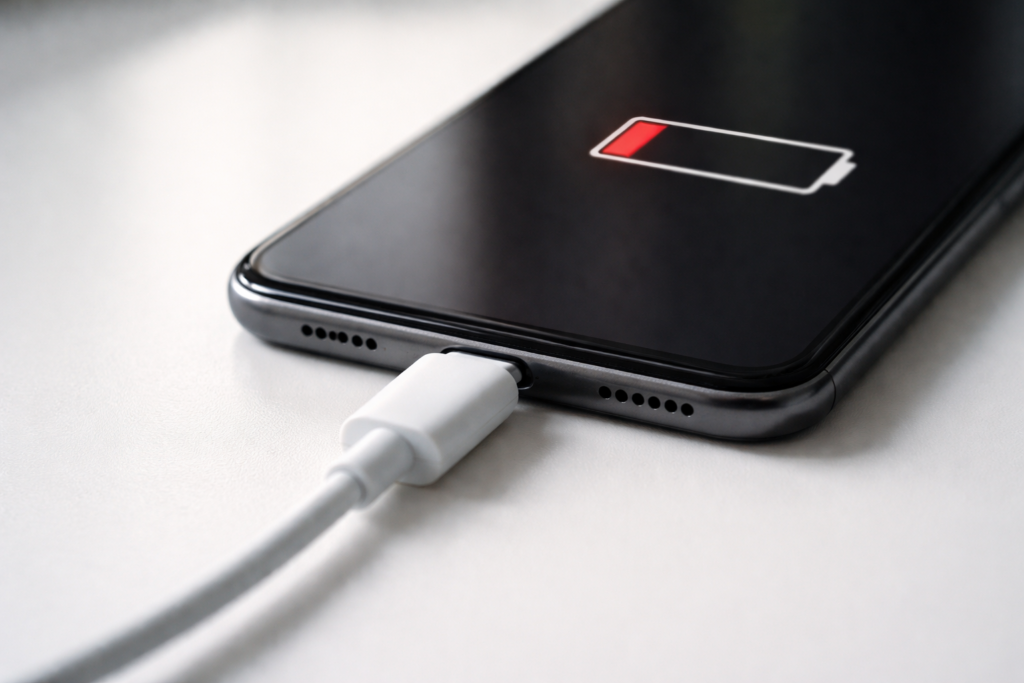
You plug your phone in, wait a few minutes, and nothing happens. No charging icon. No battery percentage climbing. Just a dead screen staring back at you. If your phone won’t charge when plugged in, you’re not alone—and you’re right to be frustrated.
At iMobile Denver, charging port failures are one of the top five reasons customers walk through our door. After years of diagnosing and repairing thousands of smartphones and tablets at our Sheridan Blvd. location, we’ve seen every variation of this problem—from simple lint clogs to catastrophic motherboard-level damage. The truth is, some charging issues are easy enough to handle from your kitchen counter, while others require microsoldering tools and trained hands.
This guide breaks it all down. We’ll walk you through the DIY fixes you can safely try right now, the warning signs that mean your port needs professional attention, and the scenarios where the damage runs deeper than the port itself. No guesswork. Just practical, experience-backed advice so you can make the right call.
Section 1: Why Phones Stop Charging — A Quick Overview
When a phone refuses to charge, there’s almost always a physical or electrical explanation behind it. Understanding the basics helps you narrow down whether you’re dealing with a five-minute fix or a trip to a qualified smartphone repair shop.
The charging system in any modern phone involves several interconnected components: the cable, the power adapter, the charging port (the physical connector on your device), and the power management integrated circuit (PMIC) on the motherboard. A failure at any single point in this chain will stop charging completely.
According to repair industry data, charging-related complaints account for roughly 20–25% of all smartphone service requests. The most common culprits, in order of frequency, are debris in the port, cable or adapter failure, worn or bent port connectors, and board-level power IC damage.
The key distinction that matters to you as a user is whether the problem is mechanical (something physically blocking or broken in the port) or electrical (a failure in the circuitry that manages power delivery). Mechanical problems are often fixable at home. Electrical ones almost never are.
If you’ve also been experiencing issues where your phone charges but won’t transfer data to a computer, that’s a different but related issue—we covered it in depth in our post on U4 IC failures and the data deadlock problem.
Section 2: Charging Port Problems You Can Fix Yourself
Before you schedule a repair or panic about your phone being bricked, try these solutions. They resolve the problem for a surprising number of the customers who come to us.
Debris and Lint Buildup in the Port
This is the number one DIY-fixable charging issue we see. Pocket lint, dust, and tiny fibers gradually pack into the Lightning or USB-C port over weeks and months. Eventually, the charging cable can’t make full contact with the connector pins.
How to clean it safely:
Power off your phone completely before doing anything.
Use a wooden or plastic toothpick—never a metal pin, paperclip, or SIM ejector tool. Metal conducts electricity and can short circuit the delicate pins inside the port.
Gently scrape along the bottom and sides of the port opening. You’ll be surprised how much compacted lint comes out.
Follow up with a few short bursts of compressed air held at an angle to blow out remaining particles.
Plug your cable back in and check if charging resumes.
We’ve seen cases where a single firm ball of compressed lint was the only thing standing between a customer and a working phone. It costs nothing to try this first.
Faulty Cable or Adapter
Charging cables degrade with use. The internal wiring frays, especially near the connector ends where bending stress is greatest. Adapters also fail, particularly cheap third-party units without proper voltage regulation.
Steps to rule out cable and adapter issues:
Try a different cable with your existing adapter.
Try a different adapter with your existing cable.
Test your cable and adapter on a different device to confirm they work.
If possible, use the original cable and adapter that came with your phone, or a certified replacement.
If your phone charges fine with a different cable or adapter, you’ve found your problem—and it’s a simple, inexpensive fix. It’s also worth noting that fast charging technology places extra stress on cables, so higher-wattage chargers may wear out cables faster than standard ones.
Software Glitches and Background Processes
Sometimes the phone is receiving power just fine, but a software bug prevents the charging indicator from displaying—or a runaway background process drains the battery faster than the charger replenishes it.
Force restart your phone. On most iPhones, this means quickly pressing Volume Up, then Volume Down, then holding the Side button until you see the Apple logo. On most Samsung devices, hold Power and Volume Down simultaneously for 10–15 seconds.
Check for operating system updates. Both Apple and Samsung have pushed updates in recent years that specifically addressed charging detection bugs.
Boot into Safe Mode (Android) to determine if a third-party app is interfering with charging behavior.
If a restart or update resolves it, the issue was software—not hardware. No repair needed.
Moisture in the Port
Modern phones with water resistance ratings (IP67 or IP68) will display a moisture detection warning and refuse to charge if sensors detect liquid in the port. This is a safety feature, not a defect.
Do not insert anything into the port to dry it. This can push water deeper or damage pins.
Shake the phone gently with the port facing down to encourage water to exit.
Let the phone air-dry in a well-ventilated area for at least 30 minutes to an hour.
Avoid rice. Despite the popular myth, rice dust can make port problems worse and the desiccant effect is negligible. A dry, room-temperature environment with airflow works better.
If the warning clears and charging resumes, you’re in the clear. If the warning persists after the phone is thoroughly dry, the moisture sensor itself may be damaged—that’s a professional repair.
Section 3: Charging Port Problems That Need Professional Repair
If you’ve tried everything above and your phone still won’t charge, the problem is almost certainly physical damage to the port or the electronics behind it. These are repairs that require specialized tools, experience, and replacement components.
Bent or Broken Connector Pins
The tiny pins inside your USB-C or Lightning port are fragile. Plugging in a cable at an angle, forcing a connector that doesn’t quite fit, or even normal wear over two to three years can bend or snap these pins. Once a pin is out of position, it can’t make proper electrical contact with the cable.
You might notice symptoms like the phone only charging when the cable is held at a certain angle, intermittent charging that drops in and out, or extremely slow charging on a cable and adapter that work fine with other devices.
At iMobile Denver, a charging port replacement on most iPhone and Samsung models is a same-day repair—typically completed within 30 to 60 minutes. The entire port assembly gets swapped out with quality replacement parts backed by our 30-day warranty.
Loose or Detached Port Assembly
The charging port is a physical component soldered or connected to the phone’s internal flex cable. Drops, impacts, or repeated stress from plugging and unplugging can loosen the port’s connection to the logic board. When this happens, the cable may feel loose or wobbly in the port, and charging becomes unreliable.
This is not something you can re-seat at home. It requires opening the device, inspecting the flex cable connection, and either re-seating or replacing the entire dock connector assembly. If you’re dealing with an iPhone, check out our dedicated iPhone repair services page, or for Samsung devices, visit our Samsung phone repair page for specifics on turnaround times and pricing.
Corrosion from Liquid Damage
Even phones rated for water resistance can sustain liquid damage over time. The IP rating measures resistance under controlled lab conditions—not real-world exposure to saltwater, soapy water, chlorinated pools, or humidity over months. Corrosion can quietly build on the port’s contact pins and the solder connections beneath them.
Visible green or white residue around the port opening is a telltale sign. But often the corrosion is hidden inside the port or on the flex cable underneath, invisible without disassembly. Corroded ports need professional cleaning with specialized solutions, and in many cases, full replacement.
If your phone has had any significant liquid exposure and is now refusing to charge, bring it in sooner rather than later. Corrosion spreads, and what starts as a port issue can progress to board-level damage if left untreated.
Section 4: When It’s Not the Port — Deeper Hardware Failures
Here’s the hard truth: sometimes the charging port itself is perfectly fine, and the failure is happening further upstream on the phone’s logic board. These are the most expensive and complex repairs, and they’re also the ones where honest diagnosis matters most.
Power Management IC (PMIC) Failure
The PMIC is a chip on your phone’s motherboard that regulates how electricity flows from the port to the battery. If this chip fails—due to a power surge from a bad charger, physical shock from a drop, or simply age—your phone may show no response at all when plugged in, or it might display the charging icon but never actually gain battery percentage.
PMIC repair is a microsoldering job. It involves removing the damaged chip under a microscope and replacing it with a donor or new IC. Not every repair shop offers this service. At iMobile Denver, we perform board-level diagnostics and can advise whether a PMIC repair is viable for your specific device or whether a replacement phone makes more financial sense.
Battery Failure
A dead or severely degraded battery can mimic charging port problems. If the battery has reached the end of its chemical lifespan—which typically happens after 500 to 800 full charge cycles, or roughly two to three years of normal use—it may refuse to accept a charge entirely.
Signs of battery failure versus port failure include the phone powering off at 20–30% battery, significant battery swelling (the screen may begin to separate from the frame), and the phone getting unusually hot during charging attempts.
A battery replacement is a straightforward repair for experienced technicians. If you’re curious about how charging habits affect battery longevity, we explored the relationship between fast charging and long-term battery health in a recent article.
Tristar or Hydra IC Failure (iPhone-Specific)
iPhones use a specialized chip—known as the Tristar (U2) or Hydra (U6) IC depending on the model—to manage the initial handshake between the Lightning cable and the phone. If this chip fails, the phone may not recognize that a cable has been plugged in at all. Common symptoms include no charging, no iTunes detection, and the phone only working with wireless charging.
This is another microsoldering repair. Non-certified cables and low-quality chargers are frequent contributors to Tristar failure, which is one reason we always recommend using MFi-certified accessories for iPhones. For a deeper look at related IC failures, our article on the U4 IC data deadlock issue covers similar diagnostic territory.
Section 5: How to Tell the Difference — A Practical Diagnostic Checklist
Before you spend money on a repair, run through this quick checklist to get a better sense of what you’re dealing with:
Try at least two different cables and two different adapters. If none work, the cable isn’t the issue.
Inspect the port with a flashlight. Look for lint, debris, bent pins, or discoloration.
Try wireless charging (if your phone supports it). If wireless works but wired doesn’t, the problem is localized to the port or its IC.
Test whether your computer recognizes the phone when plugged in via USB. If it doesn’t recognize the device and doesn’t charge, you may be dealing with an IC-level issue.
Check battery health in your phone’s settings (iPhone: Settings > Battery > Battery Health; Samsung: Settings > Battery and Device Care > Diagnostics).
Note whether the phone charges intermittently or not at all. Intermittent charging usually points to a loose connection or damaged pin. No response whatsoever is more likely electrical.
Section 6: What to Expect from a Professional Charging Port Repair
If self-diagnosis points to a hardware issue, here’s what a reputable repair experience should look like:
Transparent diagnosis first. A good shop will inspect your phone and give you a clear explanation of the problem before any work begins. At iMobile Denver, we provide a free diagnostic assessment so you know exactly what’s wrong and how much it will cost before you commit.
Quality replacement parts. Charging port assemblies vary widely in quality. We use brand-name, OEM-equivalent components—not the cheapest alternatives available. This matters for durability and reliable charging speeds after the repair.
Same-day turnaround. Standard port replacements for iPhones and Samsung Galaxy devices are completed within an hour at our shop. More complex board-level repairs may take longer, and we’ll let you know up front.
Warranty coverage. Every repair we perform comes with a 30-day warranty. If something isn’t right after the fix, we’ll take care of it.
Section 7: Preventing Charging Port Damage in the First Place
A few simple habits can significantly extend the life of your charging port:
Use certified cables and adapters. MFi-certified for iPhones, USB-IF certified for USB-C devices. Cheap cables are the most common preventable cause of port and IC damage.
Clean your port monthly. A quick pass with a wooden toothpick once a month keeps lint from accumulating to problematic levels.
Plug in straight, not at an angle. Lateral force on the connector is what bends pins over time.
Don’t charge with a wet port. Even if your phone is water-resistant, let the port dry completely before plugging in.
Consider wireless charging as your primary method. It eliminates physical wear on the port entirely, extending the connector’s lifespan for data transfer when you need it.
A phone that won’t charge is one of those problems that feels catastrophic in the moment but usually has a logical, fixable cause. Start simple: clean the port, swap your cable, restart the phone. If those steps don’t work, the issue is hardware—and that’s where experience and the right tools make the difference.
At iMobile Denver, we’ve built our reputation on honest diagnosis, quality parts, and fast turnarounds. Whether it’s a $20 port cleaning or a $150 board-level IC repair, we’ll tell you what’s actually wrong and give you real options—not upsells.
It is a common headache for many smartphone users in 2026. You plug your device into your computer, and the charging lightning bolt appears immediately. However, your PC acts like nothing happened. There is no pop-up, no folder access, and no data sync. You are stuck in a “data deadlock.”
When a phone charges but refuses to talk to a computer, many people blame the cable. While a bad cord is often the culprit, a deeper hardware issue is becoming more frequent. Specifically, a chip known as the U4 IC (or the USB controller chip) might be failing inside your device. As a technician, I have seen how this tiny component can cripple your phone’s ability to move files.
Section 1: Understanding the Data Deadlock
Your charging port does more than just take in power. It uses different “pins” or pathways for electricity and data. When your phone charges but won’t connect to your PC, the power pathway is working. However, the data pathway has a break in the link.
In 2026, modern smartphones use advanced USB-C and Lightning standards. These require a complex “handshake” between the phone and the computer. If the internal controller cannot complete this handshake, your PC will never see the device. This issue often starts after using a low-quality charger or experiencing a small liquid spill.
Section 2: The Role of the U4 IC Chip
The U4 IC chip is the “traffic cop” for your phone’s charging port. It manages the flow of both power and information.
What is U4 IC Failure?
The U4 IC (often called the Tristar or Hydra chip in older models) sits on the logic board. If this chip burns out, it loses the ability to switch to “data mode.” This is why you see the battery percentage go up while your files remain invisible.
Why Does it Fail?
Power Surges: Using cheap, non-certified cables can send a spike of voltage to the chip.
Wear and Tear: Constant plugging and unplugging can stress the board.
Micro-Corrosion: Humidity can seep into the port and short out the data pins.
If you suspect board-level damage, you may need professional smartphone repair to replace the specific micro-chip.
Section 3: Practical Troubleshooting and Advice
Before assuming your motherboard is broken, try these human-verified steps. They can save you a trip to the shop.
Test the “Data” Cable: Many cables sold today are “charge-only.” They lack the internal wiring for data. Always try an original manufacturer cable first.
Clean the Port: Pocket lint is a major cause of connection drops. Carefully use a toothpick to remove debris from the port.
Check for Driver Issues: Sometimes the PC is the problem. If you use a laptop, check your device manager for “Unknown USB Device” errors. If your computer itself is acting up, you might need computer laptop Mcbook repair to fix faulty USB ports.
Professional Diagnostic: If a new cable and a clean port don’t work, the U4 IC is likely the cause. This requires microsoldering expertise.
If the repair costs for an older device are too high, we offer easy financing options to help you get into a newer, working device quickly.
Section 4: Conclusion and Final Thoughts
A phone that won’t connect to a PC is more than an annoyance; it is a barrier to your digital life. Whether you are backing up photos or transferring work files, you need a reliable link. Most of the time, a simple cable swap fixes the issue. But when the U4 IC fails, it requires a professional touch.
Don’t let a data deadlock slow you down. If you’ve tried the basics and still have no luck, we are here to help. You can get an instant quote for your repair online. Visit our Sheridan Blvd Denver shop for a fast diagnosis. Let’s get your data moving again.
FAQs
Can a broken screen affect my data connection?
Usually, no. However, the impact that broke the screen can sometimes damage the charging port or the motherboard. If your screen is also out, check our iPhone broken screen services.
Is U4 IC failure expensive to fix?
It is a specialized repair because it involves soldering on the motherboard. However, it is much cheaper than buying a brand-new flagship phone.
Why does my phone say “This accessory may not be supported”?
This is often the first sign that either your cable is bad or your U4 IC chip is beginning to fail. It means the “handshake” failed.
Disclaimer: This guide is for informational purposes. Opening your phone or attempting motherboard repairs can void your warranty and cause permanent damage. If you are unsure, please contact us for professional assistance.
The future of computing is here, living within our smartphones as powerful AI ‘agents’ and Neural Processing Units (NPUs). These dedicated chips handle complex tasks, from enhancing photos to running advanced AI assistants. While revolutionary, this constant, demanding workload is revealing a critical vulnerability: NPU thermal cycle failures. We are seeing a worrying trend at iMobile Denver. Devices from 2024-2026 are returning with motherboard issues directly linked to NPU stress. If your phone feels unusually hot, or experiences random shutdowns, it might be an early warning sign that your AI is quietly compromising its own hardware.
Section 1: The Rise of the NPU and Its Unforeseen Stress
Modern flagship processors are no longer just about raw CPU speed. They integrate powerful NPUs designed to accelerate machine learning tasks. These include real-time language processing, advanced camera features, and increasingly, on-device AI ‘agents’ that run continuously in the background.
How NPUs Work (and Overwork) An NPU excels at parallel processing, making it incredibly efficient for AI computations. However, this efficiency comes at a thermal cost. When your AI agent is active—whether summarizing emails, predicting your next photo edit, or managing complex background processes—the NPU generates significant heat. Unlike CPUs, which can often idle, some AI agents are designed to maintain a “warm” state, perpetually ready for instant commands. This constant high-power state contributes to localized overheating. Our experience at iMobile Denver with complex motherboard repairs shows this is a growing concern.
Section 2: Diagnosing NPU Thermal Cycle Failures and the ‘2026 Reality’
The “2026 Reality” for NPUs mirrors the display issues we’ve seen with Flex-Gate. We are now seeing a surge in devices where repeated heating and cooling cycles are causing micro-fractures in the motherboard’s solder joints, particularly around the NPU module.
Key Indicators of NPU Thermal Stress:
Localized Heat: Does your phone feel excessively hot in a specific area, even during light use? This could indicate a stressed NPU.
Battery Drain: AI agents consume power. If your battery life has suddenly plummeted without heavy usage, the NPU might be overworking.
Random Restarts/Freezes: When the NPU overheats, the system often triggers a protective shutdown. This prevents permanent damage, but repeated shutdowns are a critical warning sign.
Slowdown/Lag: If your device struggles with tasks it once handled easily, the NPU might be throttling due to thermal issues.
We utilize advanced diagnostic tools to pinpoint these issues. You can for an expert assessment. Our technicians at our location are trained to identify these subtle thermal signatures.
The “Solder Joint Fatigue” Problem
Motherboards are made of many layers. Over time, constant heating and cooling causes components to expand and contract. This “thermal cycling” stresses the tiny solder balls connecting the NPU to the board. Eventually, these connections can crack or become intermittent. This leads to the catastrophic NPU thermal cycle failures we are diagnosing today.
Section 3: Protecting Your Device from AI Overload and Thermal Damage
While you can’t completely disable your device’s NPU, you can take steps to mitigate thermal stress:
Monitor AI Agent Activity: If your device allows, review which AI features are constantly running in the background. Limit unnecessary processes that demand NPU resources.
Optimize Cooling: Avoid using your phone in direct sunlight or while it’s charging on soft surfaces (like a bed), which can trap heat. Use a case that allows for proper heat dissipation.
Regular Software Updates: Device manufacturers often release updates that improve thermal management. Ensure your software is always current.
Professional Inspection: If you suspect thermal issues, a professional diagnostic is crucial. This can catch problems before they become irreversible motherboard damage. You can get an estimate for advanced diagnostics.
Consider Repair Financing: Motherboard-level repairs are complex and can be costly. If your device suffers from NPU damage, don’t rush to buy a new phone. We offer options to to help you manage the cost of specialized repair.
Section 4: Conclusion and Final Thoughts
The power of AI agents is transforming our devices, but this new frontier comes with new hardware challenges. NPU thermal cycle failures are a direct consequence of pushing these powerful chips to their limits within compact enclosures. Understanding these risks is key to extending the life of your valuable technology.
At iMobile Denver, we are at the forefront of these emerging repair complexities. We believe in providing clear, actionable insights to our customers. Don’t let your cutting-edge AI inadvertently “kill” your motherboard. Stay informed, monitor your device’s health, and seek expert help when needed. Visit our for more resources and services designed to keep your technology running optimally.
FAQs
Q: Can a software glitch cause my NPU to overheat?
A: Yes, poorly optimized software or a runaway process can force the NPU to work harder than necessary, leading to overheating.
Q: Are all devices with NPUs at risk?
A: Devices from 2024-2026, which feature highly integrated NPUs and often run always-on AI agents, show a higher susceptibility to these thermal issues due to their design.
Q: Will disabling AI features entirely prevent these failures?
A: While limiting AI activity helps, many core device functions now rely on the NPU. It’s more about managing workload and thermal conditions than complete disabling.
Disclaimer: This information is provided for general guidance on emerging hardware issues. Specific NPU thermal cycle failures require advanced diagnostic equipment and expert repair techniques. Please consult a qualified technician for accurate diagnosis and repair recommendations.
The arrival of 120Hz “Pro-Motion” technology changed how we use our phones. The fluid scrolling and instant touch response feel like magic. However, that magic comes at a steep physical cost to your device. Lately, many users report a distracting pulse or stutter on their flagship screens. This Pro-Motion display flickering is rarely a simple glitch. As technicians who see these devices daily, we know it often signals a deeper hardware struggle. We are now entering the “2026 Flex-Gate” era. This is a time when the first generation of high-refresh-rate panels is starting to hit its physical limit. At our shop, we believe in transparency. Understanding why your screen is failing is the first step toward a permanent fix.
Section 1: The Anatomy of 120Hz Burnout
To understand the failure, you must understand the technology. Standard screens refresh 60 times per second. Pro-Motion doubles that. This requires more power and generates localized heat near the display controller.
What is LTPO? Most modern flagships use LTPO (Low-Temperature Polycrystalline Oxide) panels. These allow the screen to jump from 1Hz to 120Hz instantly. While efficient for battery life, the constant switching puts stress on the Display Driver IC (DDIC).
The Heat Factor High refresh rates create heat. Over years of use, this heat can weaken the microscopic solder joints inside your phone. When these joints fail, the signal becomes unstable. This instability is what you see as flickering. Our team has studied these panels extensively. You can learn more and our technical background to see why we focus on these specific hardware failures.
Section 2: The ‘Flex-Gate’ 2026 Reality
The term “Flex-Gate” originally described laptop cables that were too short. In 2026, we see a similar issue in smartphones. The ribbon cables connecting your screen to the motherboard are thinner than ever.
Why Cables Fail Now
120Hz displays require more “lanes” of data. This makes the cables more complex and more fragile. Every time your phone gets warm or experiences a minor drop, these cables endure stress.
Micro-Fractures: Tiny cracks form in the copper traces of the cable.
Signal Interference: As the cable degrades, it cannot handle the 120Hz data load.
Voltage Drops: If the cable cannot deliver steady power, the backlight will strobe.
If you suspect your cable is failing, come see us at . We can perform a physical inspection to see if the cable is pinched or worn.
The Role of Battery Health
Interestingly, your battery plays a role in Pro-Motion display flickering. High refresh rates require “peak power.” If your battery health is low, the system may throttle voltage. This causes the display to “struggle,” leading to noticeable visual artifacts.
Section 3: Deep Troubleshooting and Practical Advice
Before you assume your phone is a total loss, there are steps you can take. We recommend a “triage” approach to display issues:
1. The 60Hz Stress Test Go to your Display Settings and find “Motion Smoothness.” Switch it from Adaptive to Standard. If the flickering disappears, your 120Hz controller is likely damaged. This buys you time, but it won’t fix the underlying hardware.
2. Thermal Management If your screen flickers only when the phone is hot, the issue is thermal expansion. Avoid using your phone while charging. This reduces the heat near the display ribbon.
3. Professional Diagnostic Software cannot fix a cracked ribbon cable. We suggest getting a professional opinion before the screen goes black. You can to describe your symptoms and get expert feedback.
4. Budgeting for the Fix Screen repairs are expensive, especially for Pro-Motion panels. We provide an to help you plan. If the cost is high, don’t worry. You can to spread the payments out while getting your phone back to 100%.
Section 4: Conclusion and Final Thoughts
The “120Hz Burnout” is a real challenge for modern smartphone owners. While we love the speed of these displays, we must respect their fragility. The 2026 Flex-Gate reality reminds us that even the best tech has a shelf life.
If your screen is pulsing, don’t ignore it. It is your phone’s way of asking for help. By catching the issue early, you might avoid a total “Green Screen of Death.” Whether you need a simple cable adjustment or a full panel replacement, iMobile Denver has the tools to help. Visit our to see our full range of repair services and let’s keep your display smooth for years to come.
FAQs
Does a cracked screen cause more flickering?
Yes. A crack breaks the structural integrity of the OLED layers. This often leads to vertical lines and rapid flickering.
Can I fix a flickering Pro-Motion display at home?
Unfortunately, no. These repairs require a clean-room environment and specialized bonding tools to navigate the “Flex-Gate” issues.
Will a software update ever fix this?
If the flicker is caused by a driver bug, an update might help. However, 90% of the cases we see in 2026 are purely hardware-based.
Disclaimer: This guide provides informational insights into hardware trends. Always consult with a certified technician before attempting any internal repairs. We are not responsible for damage caused by DIY attempts.