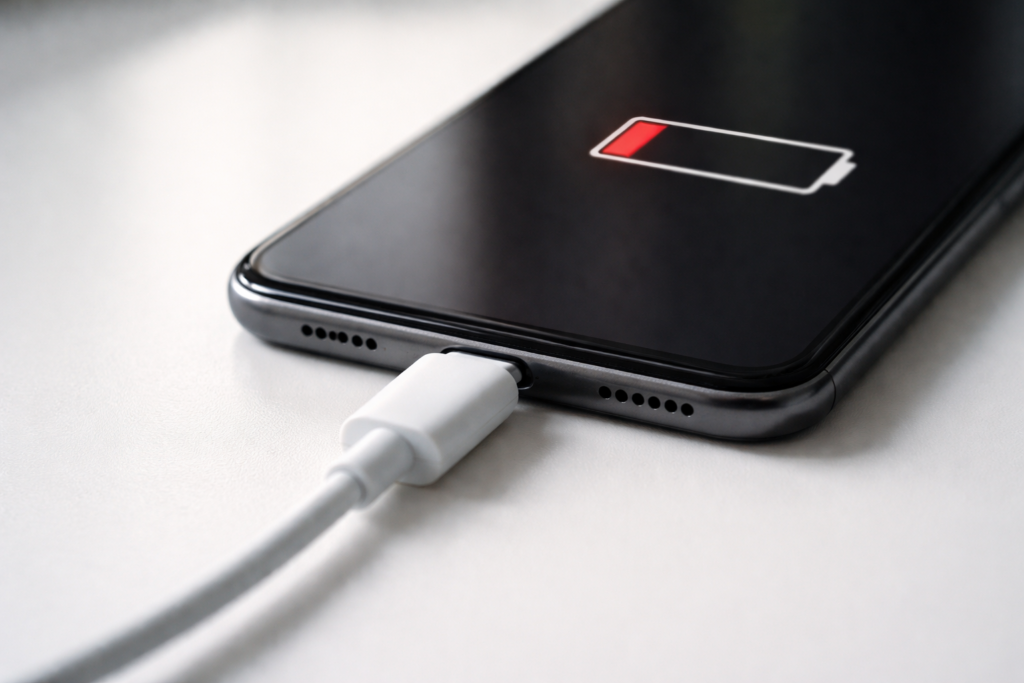
iPhone screen repair in Denver is the single most common repair we perform at iMobile Denver on Sheridan Blvd — and we’ve been doing it for over five years. A cracked screen can happen to anyone, at any time. You set your phone down wrong, it slips off a counter, it falls out of your jacket pocket on the 16th Street Mall. One second you have a working iPhone, the next you’re staring at a spiderweb of cracks or a display that’s gone dark entirely.
Most people in Denver assume a cracked iPhone screen means a long wait, an expensive bill, or a trip to the Apple Store across town. At iMobile Denver, it means a 15-minute repair, done while you wait, using top-quality brand-name parts, backed by a warranty. That’s not a marketing line — it’s what our customers experience every day.
This guide covers what’s actually happening inside a cracked iPhone screen, what the repair process looks like, what it costs in Denver, why altitude matters, and what makes a repair shop worth trusting on the Front Range.
Section 1: What’s Actually Broken When Your iPhone Screen Cracks {#section1}
iPhone screen repair in Denver starts with understanding what you’re actually dealing with — because “broken screen” can mean several different things depending on what happened.
The 3 Layers Inside Every iPhone Display
Your iPhone screen isn’t a single piece of glass. It’s a precisely engineered stack of three bonded components. The outermost layer is chemically strengthened Gorilla Glass — tougher than ordinary glass, but not indestructible against concrete sidewalks or hardwood floors. Behind the glass sits the display panel: an LCD on older iPhones and SE models, and an OLED on iPhone X and every model after. Bonded to the display is the digitizer — the touch-sensitive layer that translates every tap and swipe into an input the phone can understand.
On modern iPhones, these three layers are fused together during manufacturing. This is important because it means a crack in the outer glass can simultaneously stress the display panel beneath it — even when the display appears to be working normally right after the drop. What looks like cosmetic damage on the surface can be the beginning of a deeper failure.
The Difference Between Cosmetic and Functional Damage
Not every cracked iPhone screen needs the same urgency. A hairline fracture near the edge that doesn’t affect touch or display quality is cosmetic. The phone works. It just looks damaged. But these signs mean the damage has gone deeper and needs attention:
- Lines, dark spreading patches, or green tinting running through the display
- Areas of the screen not responding to touch, or ghost taps registering without any input
- The screen flickering or going black while the phone still powers on and vibrates
- Face ID stopped functioning after the drop
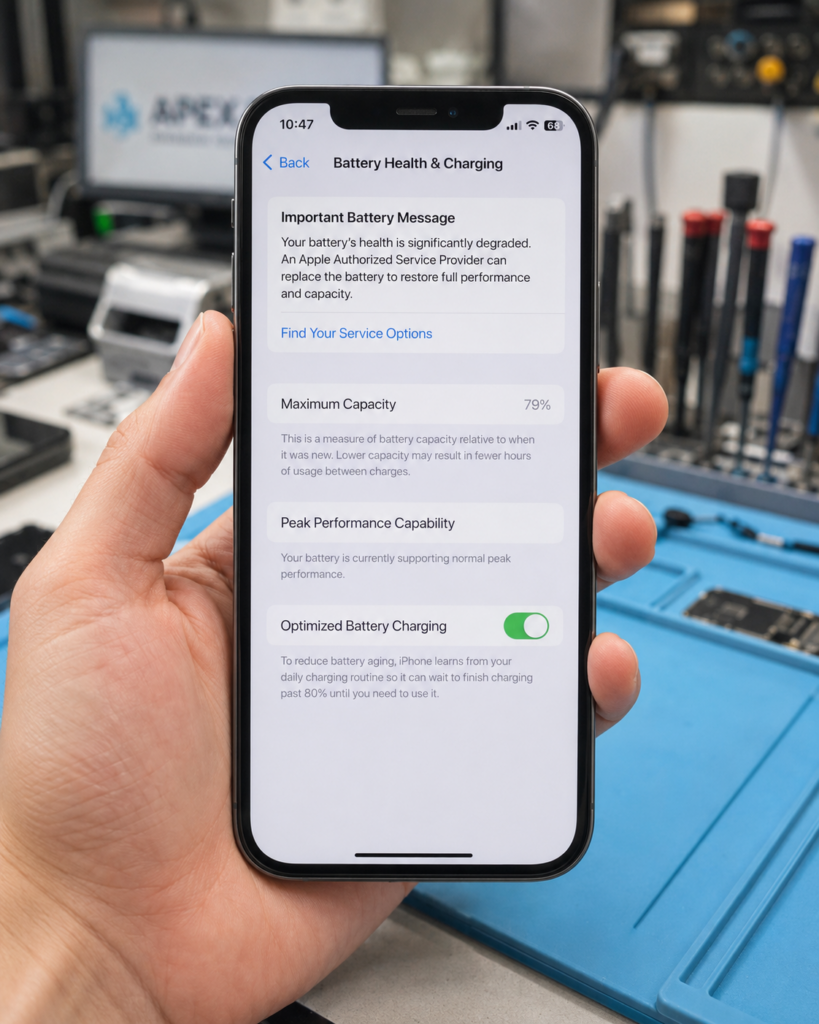
Functional display damage doesn’t improve on its own. As we’ve covered in our post on ProMotion display flickering and flex cable failures, the display stack on modern iPhones is sensitive to both physical stress and the thermal cycling that comes with everyday use. A crack introduces both — and the damage spreads.
When Face ID Is at Risk
On iPhone X and later, Face ID relies on hardware in the top of the screen assembly — a dot projector, flood illuminator, and infrared camera that work together to map your face. All of this routes through the screen. An improper screen replacement at an inexperienced shop can permanently disable Face ID because the Face ID module isn’t correctly transferred. Once it’s disabled by a bad repair, Apple’s security architecture prevents any third party from restoring it. This is why choosing an experienced shop for iPhone screen repair in Denver isn’t just about getting a good-looking display — it’s about protecting critical functionality.
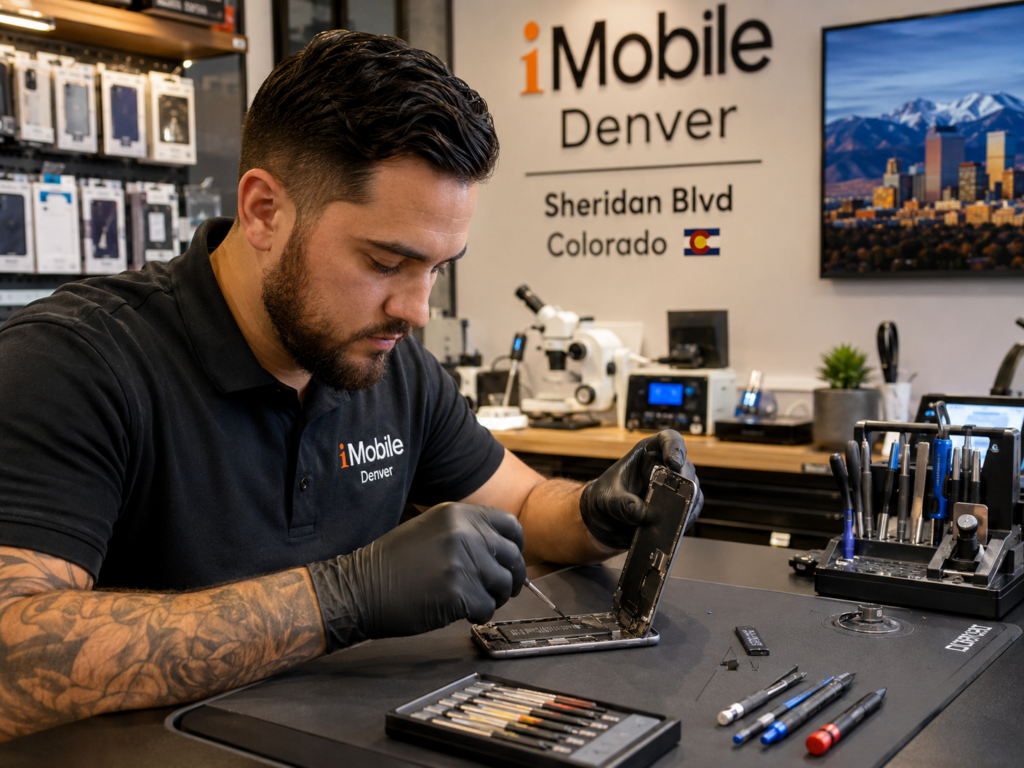
Section 2: The iPhone Screen Repair Process at iMobile Denver {#section2}
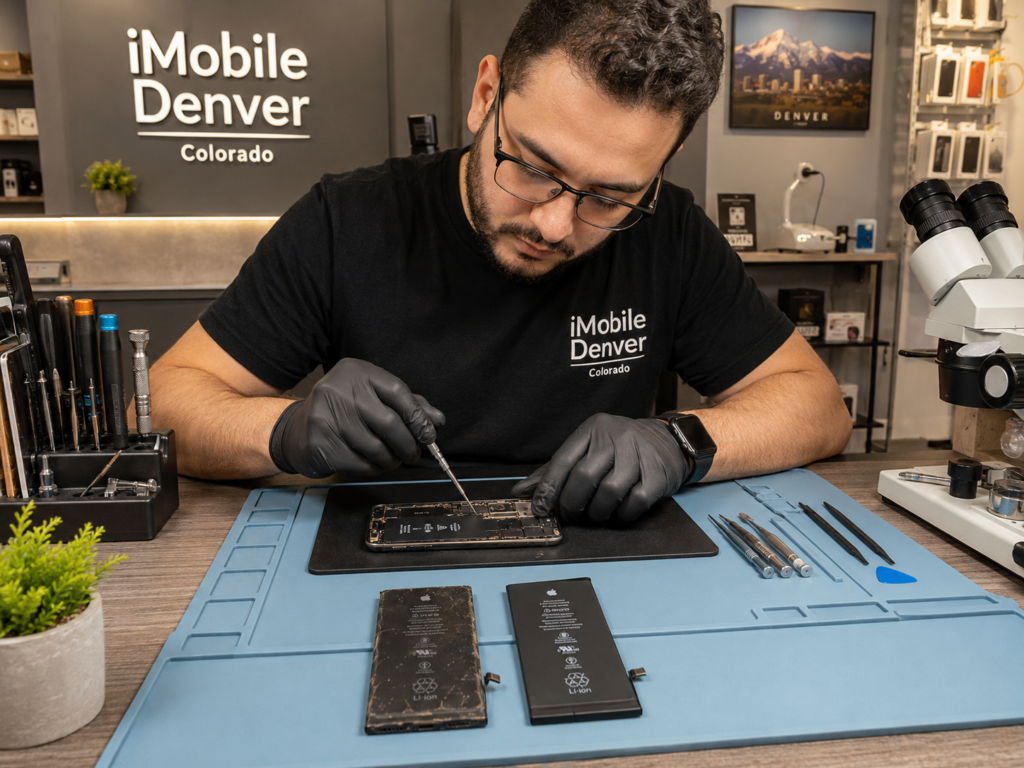
Here’s what happens when you bring your cracked iPhone into iMobile Denver on Sheridan Blvd.
Instant Quote Before You Come In
Use our instant quote tool to get a transparent, accurate price for your specific iPhone model and issue before you visit. Different models use different display assemblies — the quote reflects your actual device, not a generic estimate. First-time customers get $10 off.
The Repair — 15 Minutes for Most Models
iPhone screen replacement at iMobile Denver is a precision process our technicians perform daily. The damaged display assembly is separated using controlled heat, display cables are carefully disconnected, and the Face ID module, front camera, and earpiece speaker are transferred to the replacement display. The new screen is installed, adhesive is properly applied, and the phone is reassembled.
For most iPhone models, this takes approximately 15 minutes. You wait in the shop. You leave with a working screen.
We use top-quality brand-name parts in every repair. This is the commitment that defines how we operate. Cheap aftermarket displays look fine for a few weeks before showing their true quality — duller brightness in Denver’s sunny outdoor conditions, colours that shift at off-angles, and touch responsiveness that degrades at the screen edges. Our parts don’t do that. When we fix your device, we want it to stay fixed.
Testing Before You Leave
Every repaired iPhone is tested before it goes back in your hands. We verify touch sensitivity across the full screen, check display brightness and colour accuracy, confirm Face ID is working correctly, and test the front camera and earpiece. You see all of this before you walk out. If anything is off, we address it before you leave — not after.
Section 3: What Does iPhone Screen Repair Cost in Denver? {#section3}
The cost of iPhone screen repair in Denver varies based on your specific model and the type of damage.
Model Determines Parts Cost
An iPhone SE screen repair and an iPhone 16 Pro Max screen repair are not the same job or the same cost. Older LCD displays cost less than newer OLED panels. Pro models with ProMotion, always-on displays, and Dynamic Island use premium display assemblies with higher component costs. Always provide your exact model — not just “iPhone” — when using the instant quote tool to get an accurate price.
The Type of Damage Matters
If only the outer glass is cracked and the OLED functions perfectly with Face ID intact, you’re looking at a standard screen swap — the most common and most affordable outcome. If the OLED panel has dead zones, lines, or spreading discoloration, the panel itself has failed. If Face ID stopped working after the drop, the repair requires careful module transfer and post-repair configuration. Our technicians handle all of these correctly on every job.
Financing Available
Don’t let cost prevent you from getting your phone fixed properly. iMobile Denver offers financing options that let you get the repair done today and manage the cost over time. Getting your iPhone repaired on a payment plan is almost always a better financial outcome than continuing to use a damaged phone or buying a replacement.
30-Day Warranty Included
Every screen repair comes with a 30-day warranty on parts and workmanship. If something goes wrong with the repair within that period for a covered reason, we take care of it at no charge.
Section 4: How Denver’s Altitude and Climate Affect Your Cracked Screen {#section4}
iPhone screen repair in Denver carries one consideration that doesn’t apply in most other cities — Colorado’s environment is genuinely harder on phone hardware than most people realize.
Altitude and Atmospheric Pressure
Denver sits at 5,280 feet above sea level. The lower atmospheric pressure at this elevation subtly affects the thermal management of tightly packed electronics. More practically, a phone with an internal display fracture — even one not yet visible on the surface — experiences slightly less external pressure holding the layers together. This allows micro-fractures to propagate faster than they would at sea level.
Temperature Swings Stress the Display Stack
Colorado is notorious for dramatic daily temperature swings. A cold January morning walk to your car, a warm drive to work, a heated office, a cold parking garage — your phone’s display stack goes through significant thermal expansion and contraction throughout a single Denver day. Every cycle flexes the adhesive bonding between the glass, display panel, and digitizer. On a healthy screen, this is imperceptible. On a cracked screen with internal damage, each cycle can advance the fracture further.
According to research published by NIST (National Institute of Standards and Technology), thermal cycling is one of the primary mechanisms of adhesive failure in bonded structures — exactly the situation inside a fused iPhone display stack. This is why screens that were “still working” after a drop in Denver often fail completely within a week in winter.
The Practical Takeaway
If your iPhone screen cracked in Denver, don’t wait. The combination of altitude, temperature swings, and dry air means that what’s cosmetic today has a higher chance of becoming functional damage within days than it would in a more stable climate. A 15-minute repair now is almost always simpler and cheaper than a more involved repair after the OLED has failed.
Section 5: Why iMobile Denver Is the Right Choice for iPhone Screen Repair in Denver {#section5}
5+ Years on Sheridan Blvd — Locally Owned and Trusted
iMobile Denver has served the Sheridan Blvd neighborhood and the wider Denver metro area for over five years. We’re not a national chain or a franchise operating from a playbook. We’re a locally owned shop where Mehmet and Aria know their customers by name and where the same experienced technicians perform your repair every visit.
We also serve Denver’s Spanish-speaking community directly — Aria is available at (720) 319-9262 for customers who prefer to communicate in Spanish.
15-Minute Screen Repairs While You Wait
This is real. Most iPhone screen repairs at iMobile Denver are completed in approximately 15 minutes. You don’t leave your phone and come back tomorrow. You wait, you watch if you’d like, and you leave with a working iPhone. For Denver residents who depend on their phone for work, navigation, communication, and everything else, that turnaround matters.
Every iPhone Service Under One Roof
iMobile Denver handles iPhone repair, Samsung phone repair, iPad repair, computer and MacBook repair, game console repair, and other device repair — all at the same Sheridan Blvd location. If your cracked iPhone screen came with a dented back or a charging port problem, we can assess and address everything in one visit.
Buy, Sell, and Finance
If repair doesn’t make financial sense for a heavily damaged or very old phone, iMobile Denver has other options. Our refurbished device inventory carries inspected iPhones at a fraction of retail cost. We also buy used and broken phones for fair same-day payment. And financing means cost is never a reason to leave your phone unrepaired. Check our device repair FAQs and common repair questions for more detail on what to expect.
FAQs: iPhone Screen Repair Denver {#faqs}
How long does iPhone screen repair in Denver take at iMobile Denver? Most iPhone screen repairs are completed in approximately 15 minutes. More complex cases — phones with multiple issues or models requiring more extensive disassembly — may take longer. We’ll give you an accurate time estimate after confirming your model and assessing the damage.
Will Face ID still work after my screen is replaced? Yes — at iMobile Denver, Face ID is preserved correctly on every screen replacement. The Face ID hardware lives inside the screen assembly and must be carefully transferred to the replacement display and properly configured. We do this correctly on every repair. A shop that mishandles this step can permanently disable Face ID, and no independent technician can restore it afterward.
What warranty comes with iPhone screen repair in Denver? Every screen repair at iMobile Denver comes with a 30-day warranty on parts and workmanship. If the repair fails for a covered reason within that window, we fix it at no charge.
My iPhone screen cracked but still works fine — should I repair it now or wait? We strongly recommend repairing sooner rather than later in Denver. The combination of altitude, daily temperature swings, and dry air means that cosmetic screen damage here progresses to functional damage faster than in most other cities. A 15-minute repair today is almost always simpler and cheaper than a panel replacement after the display fails.
Is it worth repairing an older iPhone screen or should I just get a new phone? In most cases, repair is the better financial decision — even on phones 3–4 years old. Use our instant quote tool to see the repair cost for your specific model and compare it against the cost of a replacement. Our refurbished device inventory is also worth checking if you’re considering an upgrade.
Do you offer any discounts on iPhone screen repair in Denver? First-time customers get $10 off their repair. We also have 20% off accessories. Financing is available if you need to spread the cost over time.
This article is for general informational purposes only. For an accurate assessment of your specific iPhone and damage, visit iMobile Denver at 1272 S Sheridan Blvd, Denver CO 80232, or use our instant quote tool to get started.